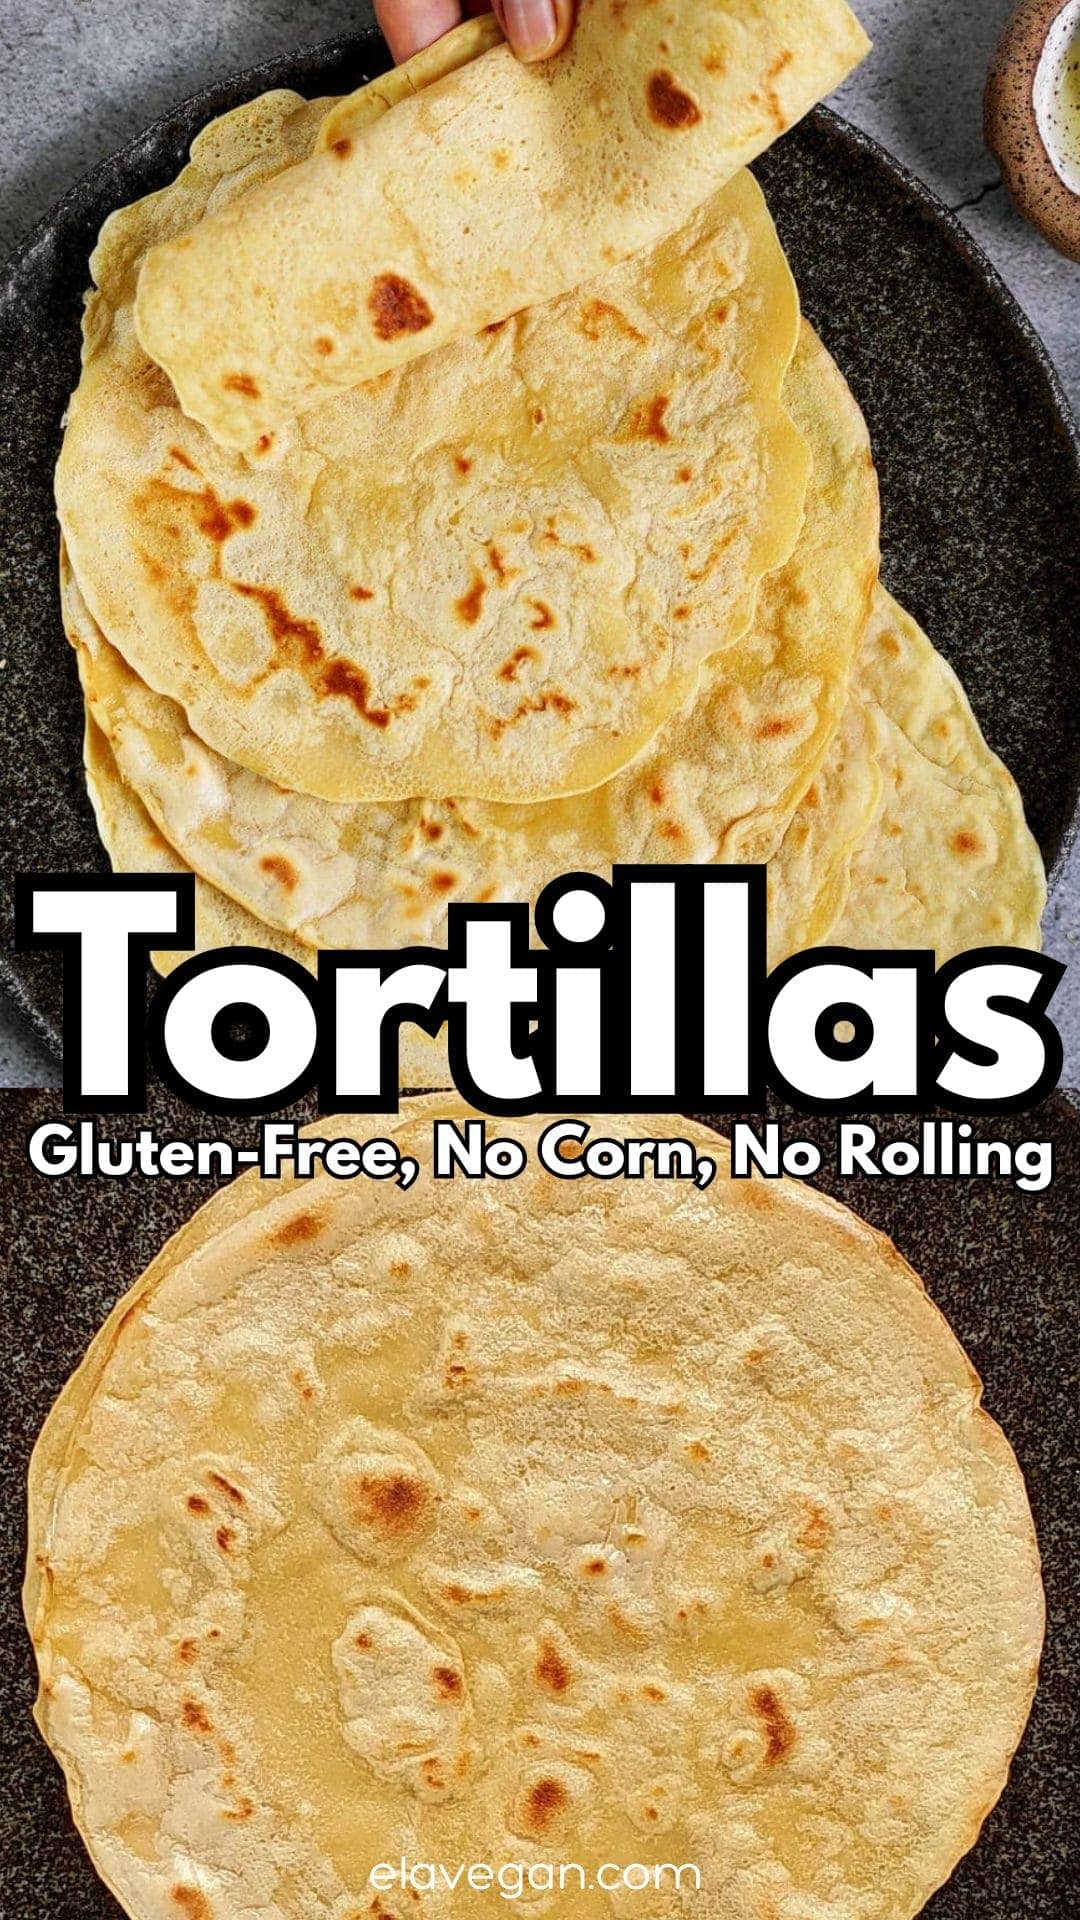
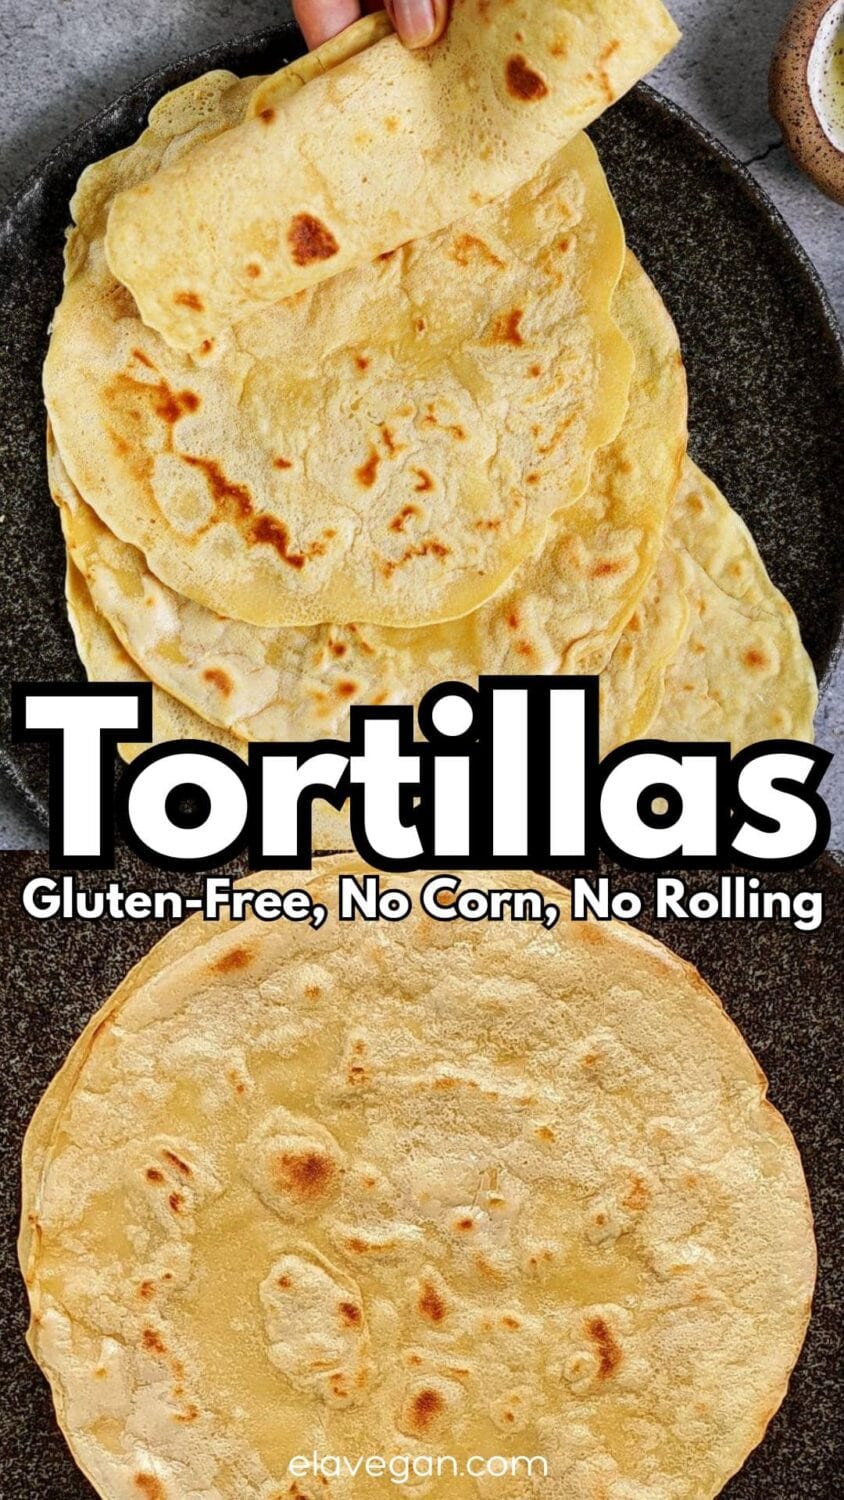
Made with chickpea flour, these easy gluten-free tortillas are ready in just 15 minutes and are soft, pliable, and truly versatile! + wheat, grain, corn, and yeast-free.
My Favorite Gluten-Free Wraps
Get ready to try the BEST gluten-free tortillas (and I don’t say that lightly!), with zero wheat, corn, or yeast. This chickpea flour tortilla recipe has been on my blog since 2017 and even earned a spot in my Simple and Delicious Vegan cookbook. Rotated with my lentil tortillas, they’ve completely replaced store-bought versions in my kitchen, with no preservatives or unnecessary ingredients!
Most importantly, they actually taste good and don’t crumble or tear! Instead, they’re ultra quick and easy, made from a pourable batter rather than a dough (so no kneading or rolling!), and are easy to adjust the size and thickness. The result is soft, pliable tortillas perfect for tacos, vegan breakfast burritos, vegan quesadillas, lentil enchiladas, and more.
You can also enjoy chickpea flour in my spinach tortillas, chickpea flour bread, gluten-free gnocchi, and/or a vegan frittata.
The Ingredients
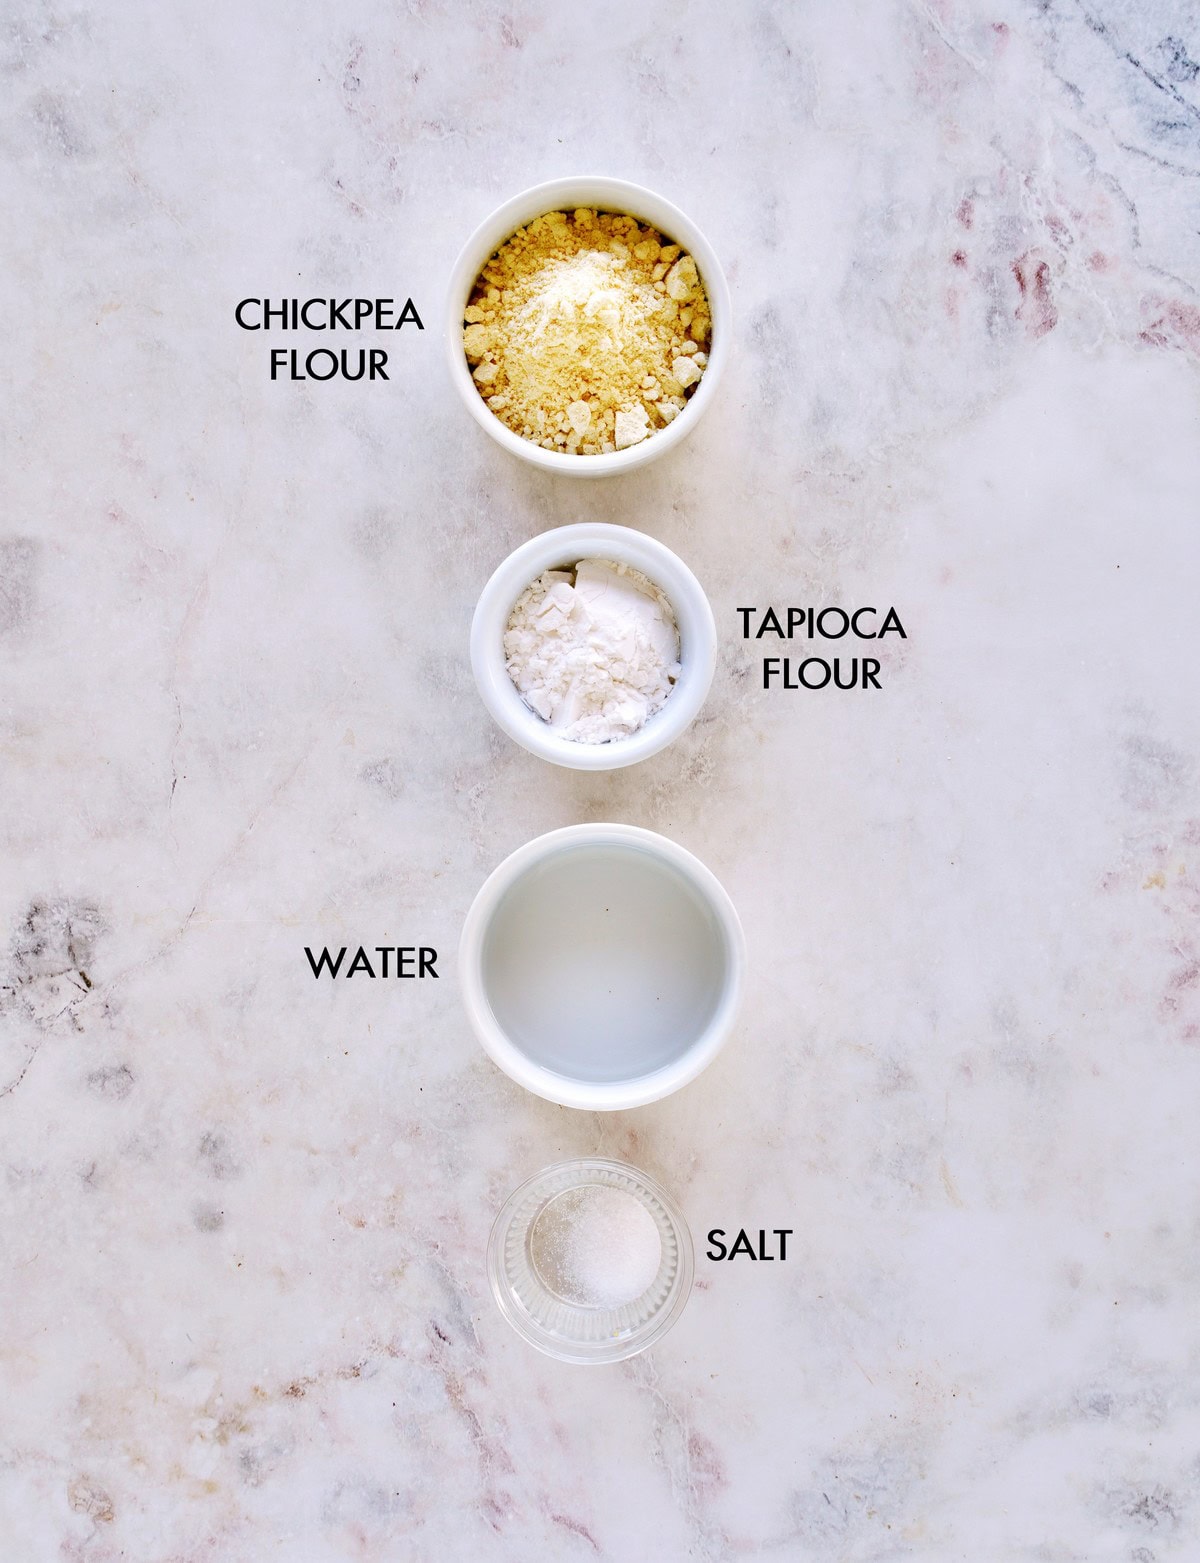
- Chickpea flour: Aka garbanzo bean flour or besan. (Gram flour also works). This adds pleasant flavor and is high-protein, high-fiber, and contains several vitamins and minerals (like folate, magnesium, copper, zinc, etc). Ensure it’s fresh to avoid bitter/stale flavors.
- Tapioca flour/starch: To make the gluten-free wraps pliable. Cornstarch, arrowroot, or even potato starch should work, though tapioca is my favorite.
- Salt: To season the wraps. Omit if preferred (and when pairing with sweet fillings).
For the full ingredients list, measurements, complete recipe method, and nutritional information, read the recipe card below.
How to Make Gluten-Free Tortillas
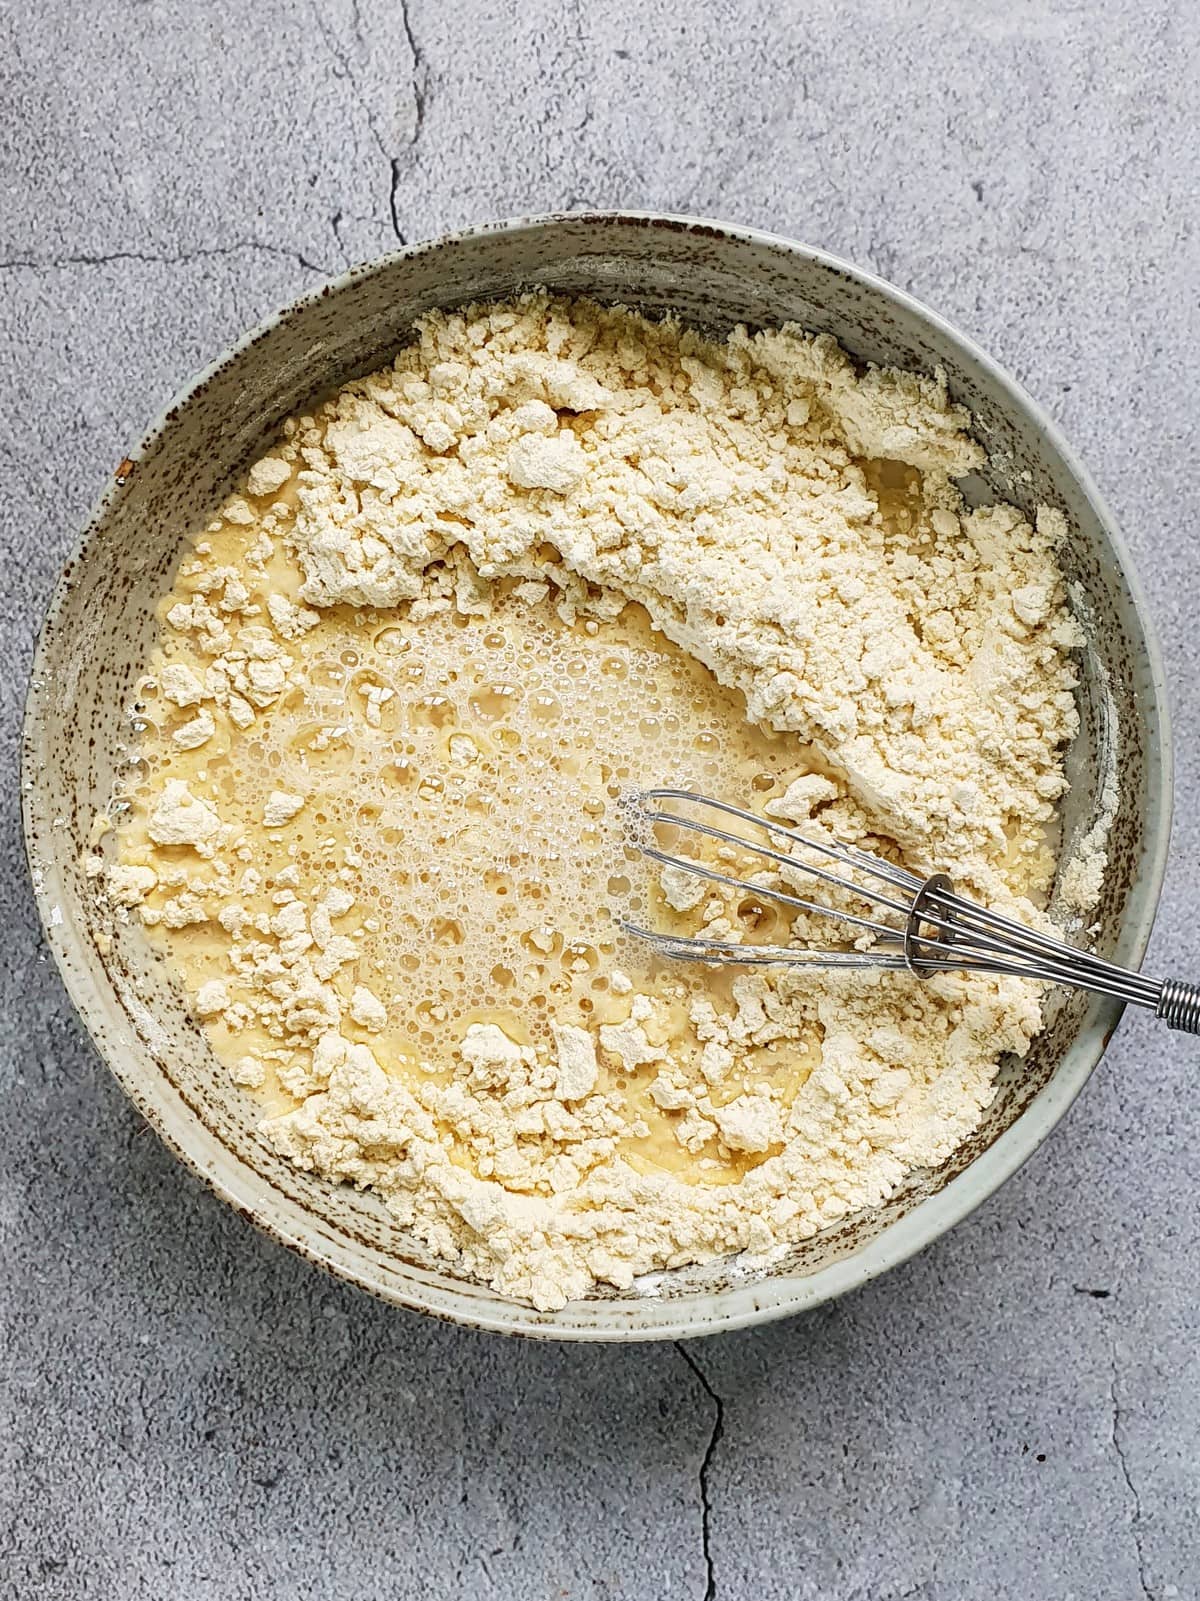
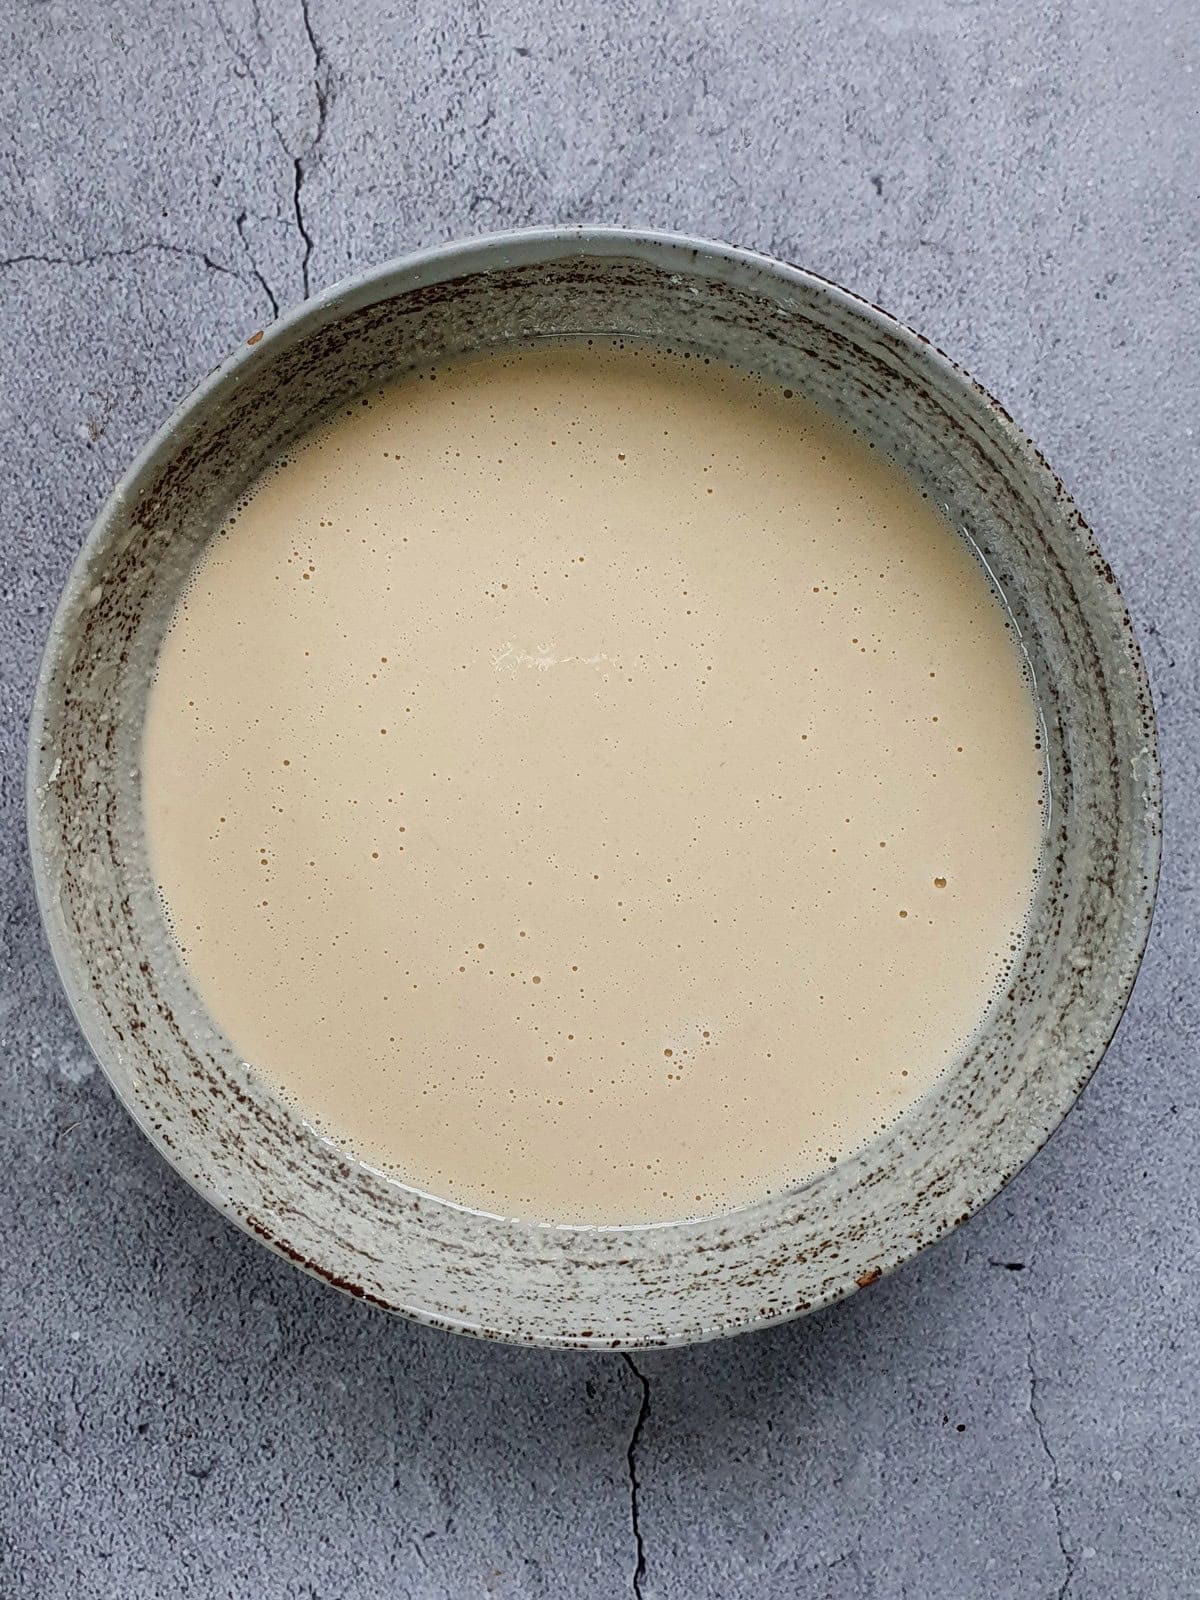
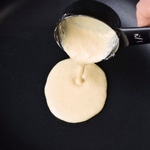
- Whisk all the ingredients (or blend them) into a smooth batter.
Use ¾ cup (180 ml) water for thick tortillas (perfect for soft taco shells), 1 cup (240 ml) for thinner pliable tortillas, or up to 1 2/3 cup (400 ml) for thin, crepe-like wraps.
- Meanwhile, heat a skillet over medium with a little oil (no oil is needed if you use a non-stick pan, but it’s best to lightly grease the pan for the first wrap).
- Pour ¼-1/3 cup of batter (great for taco size; Use more for burrito-sized tortillas) into the pan.
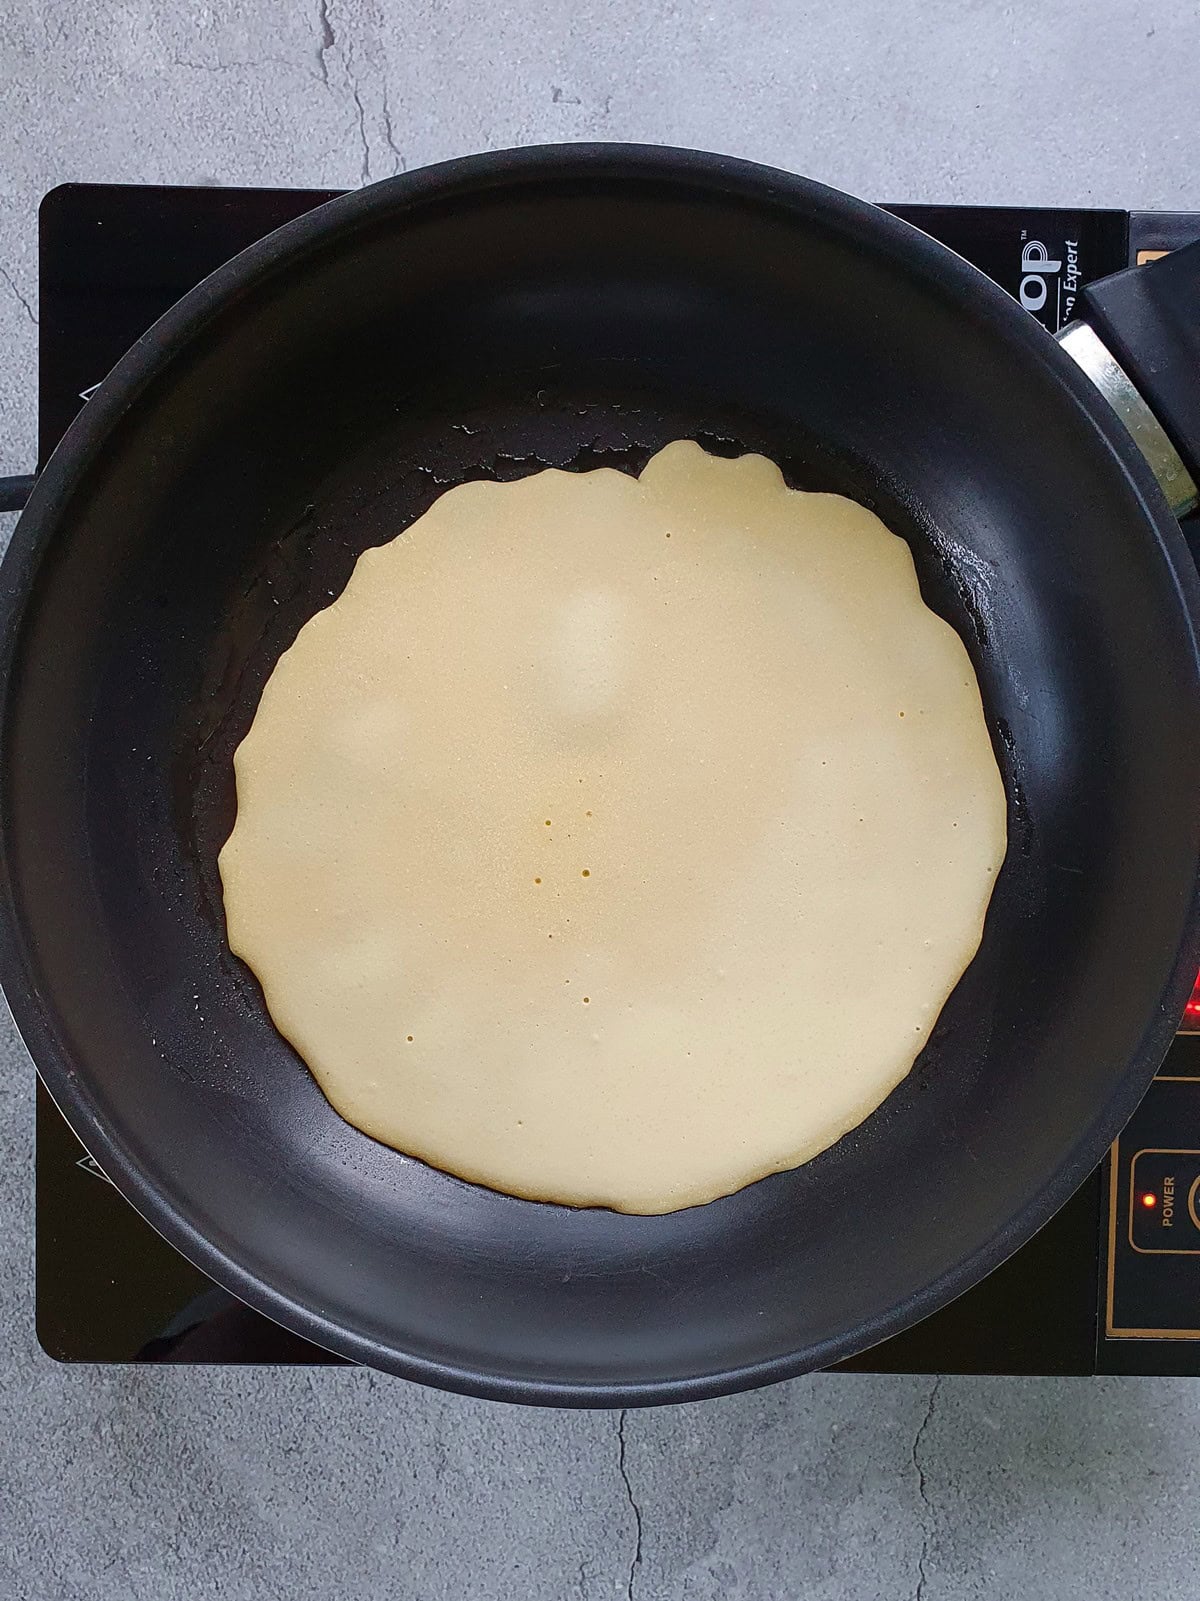
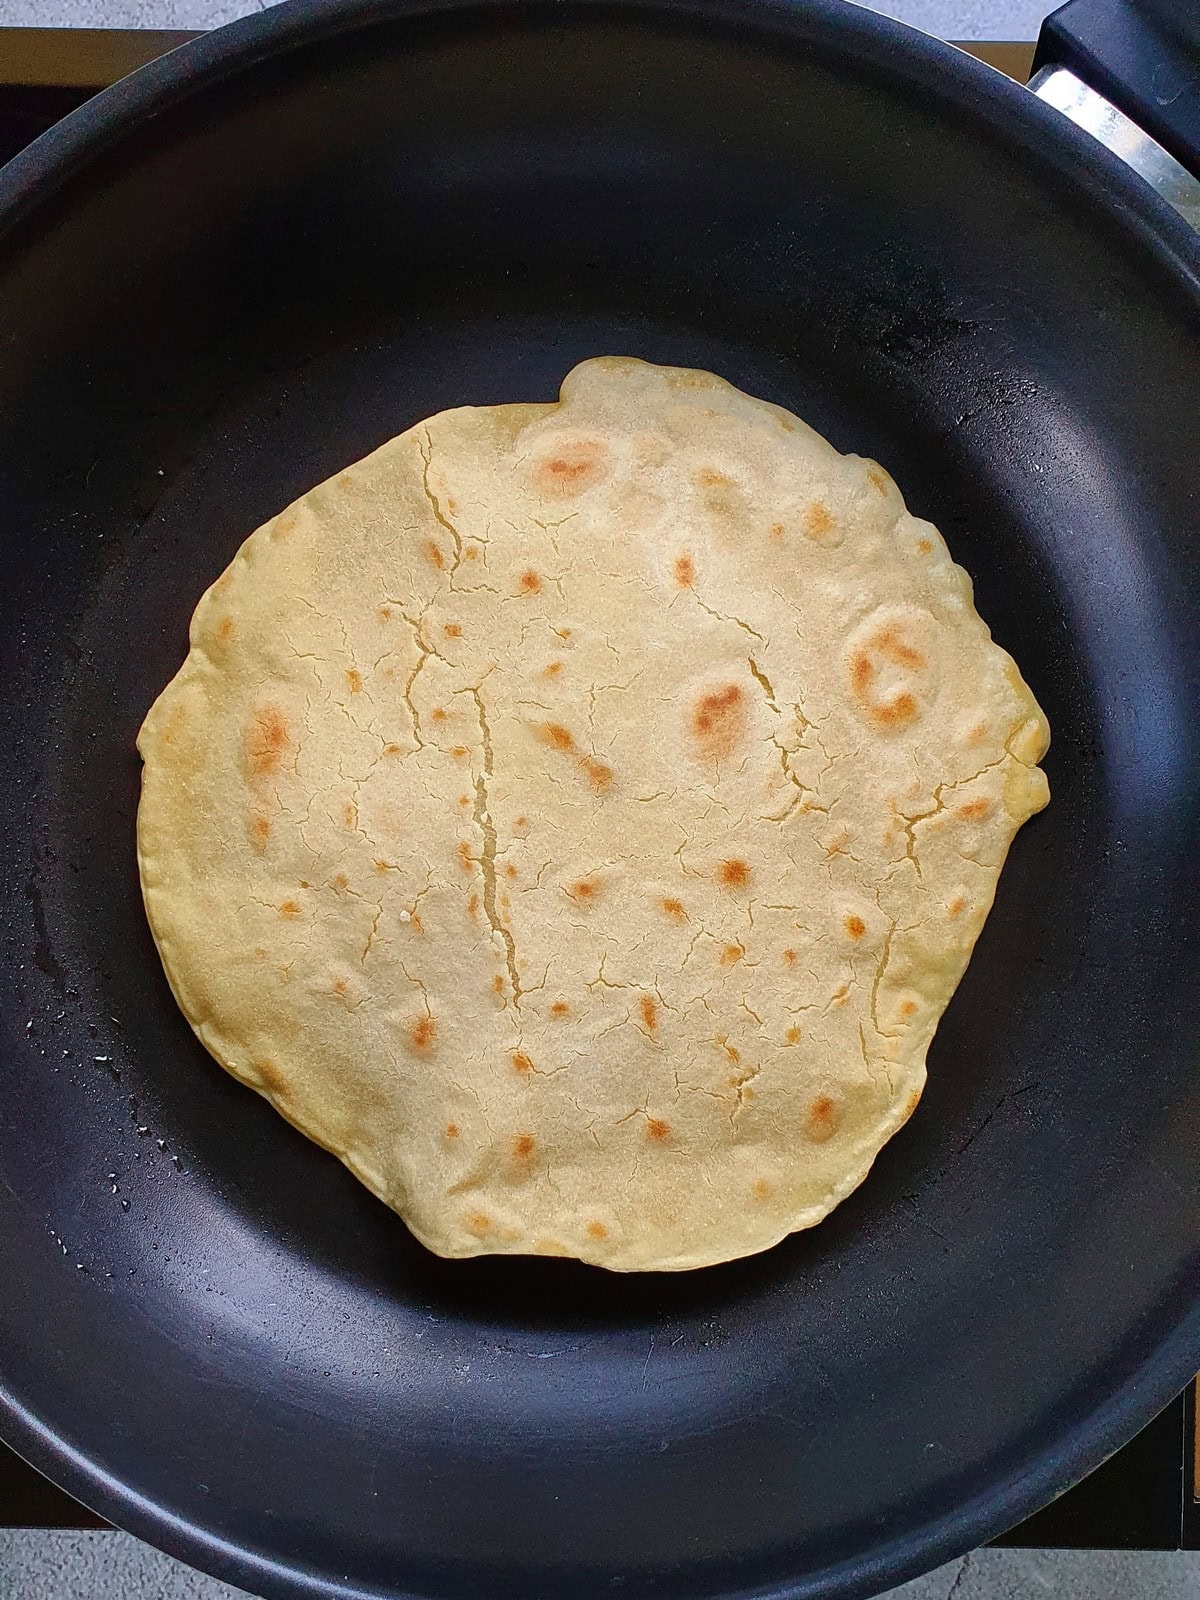
- Cook for about two minutes per side, until cooked through with brown spots.
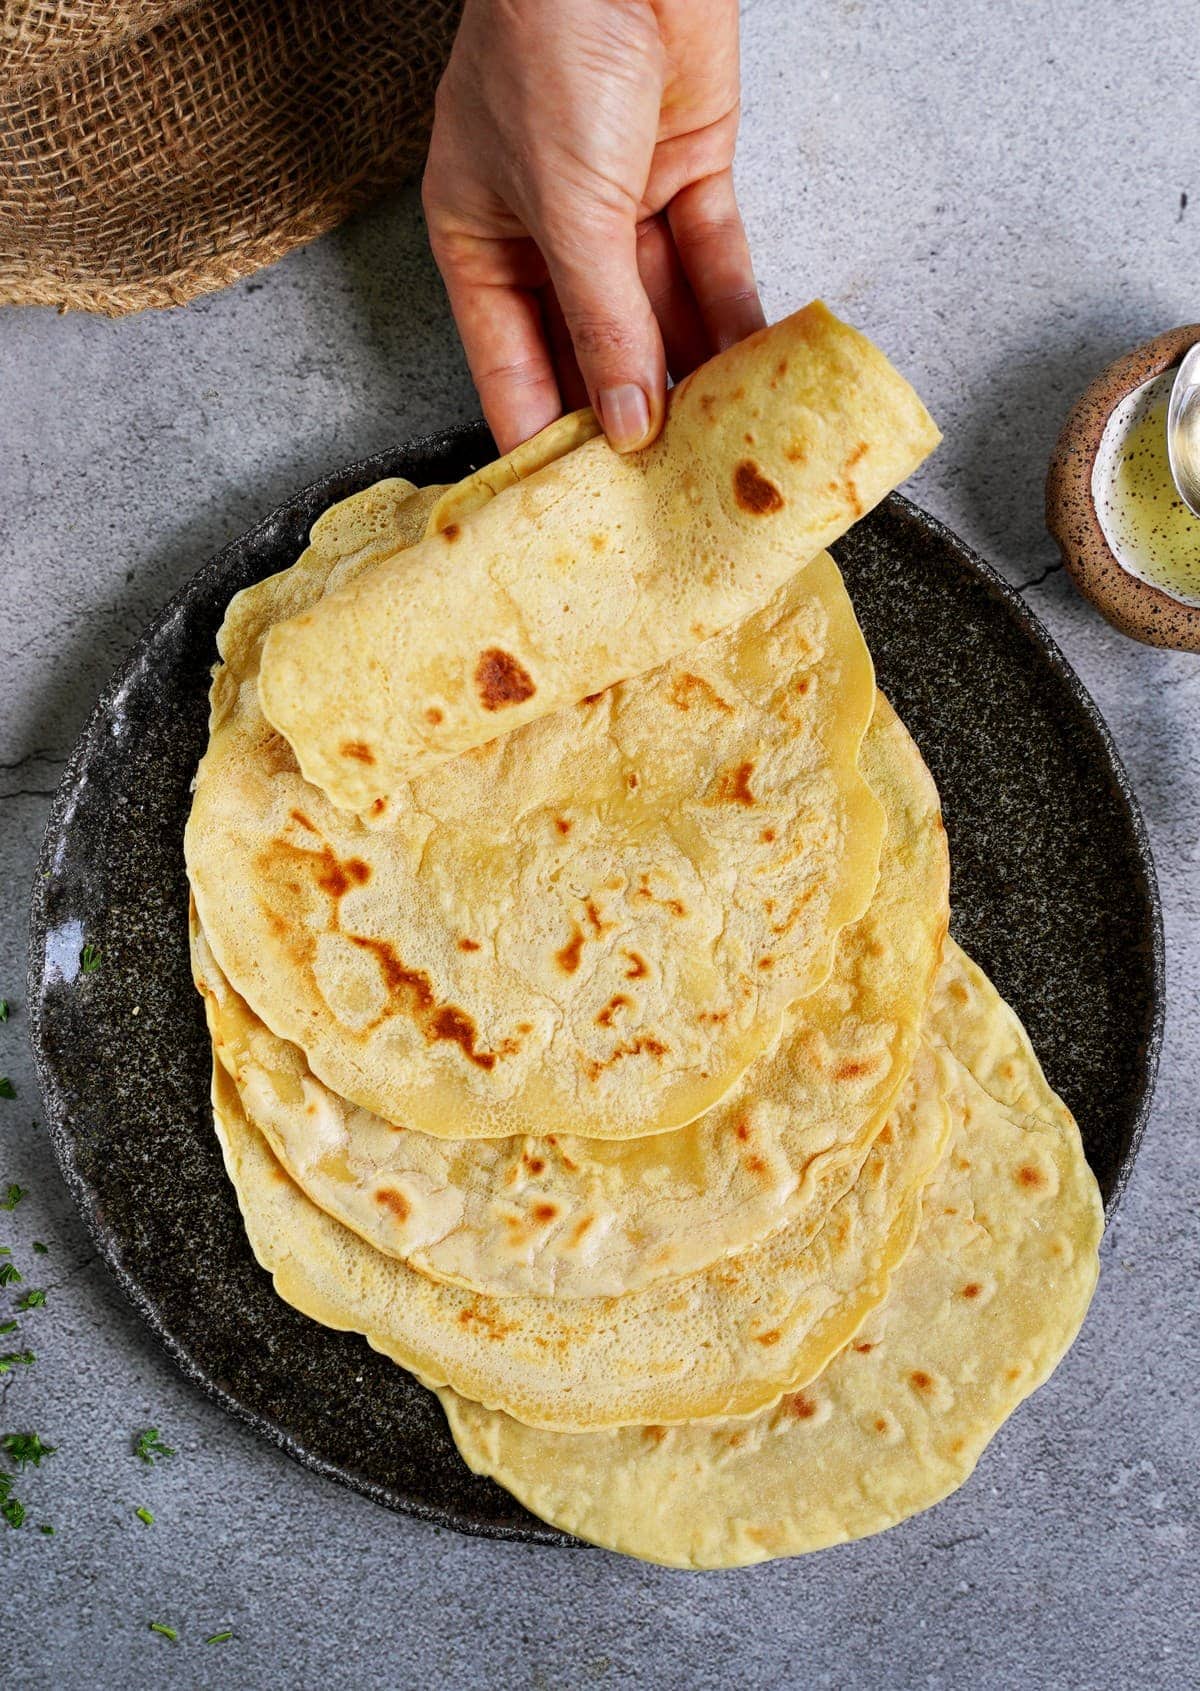
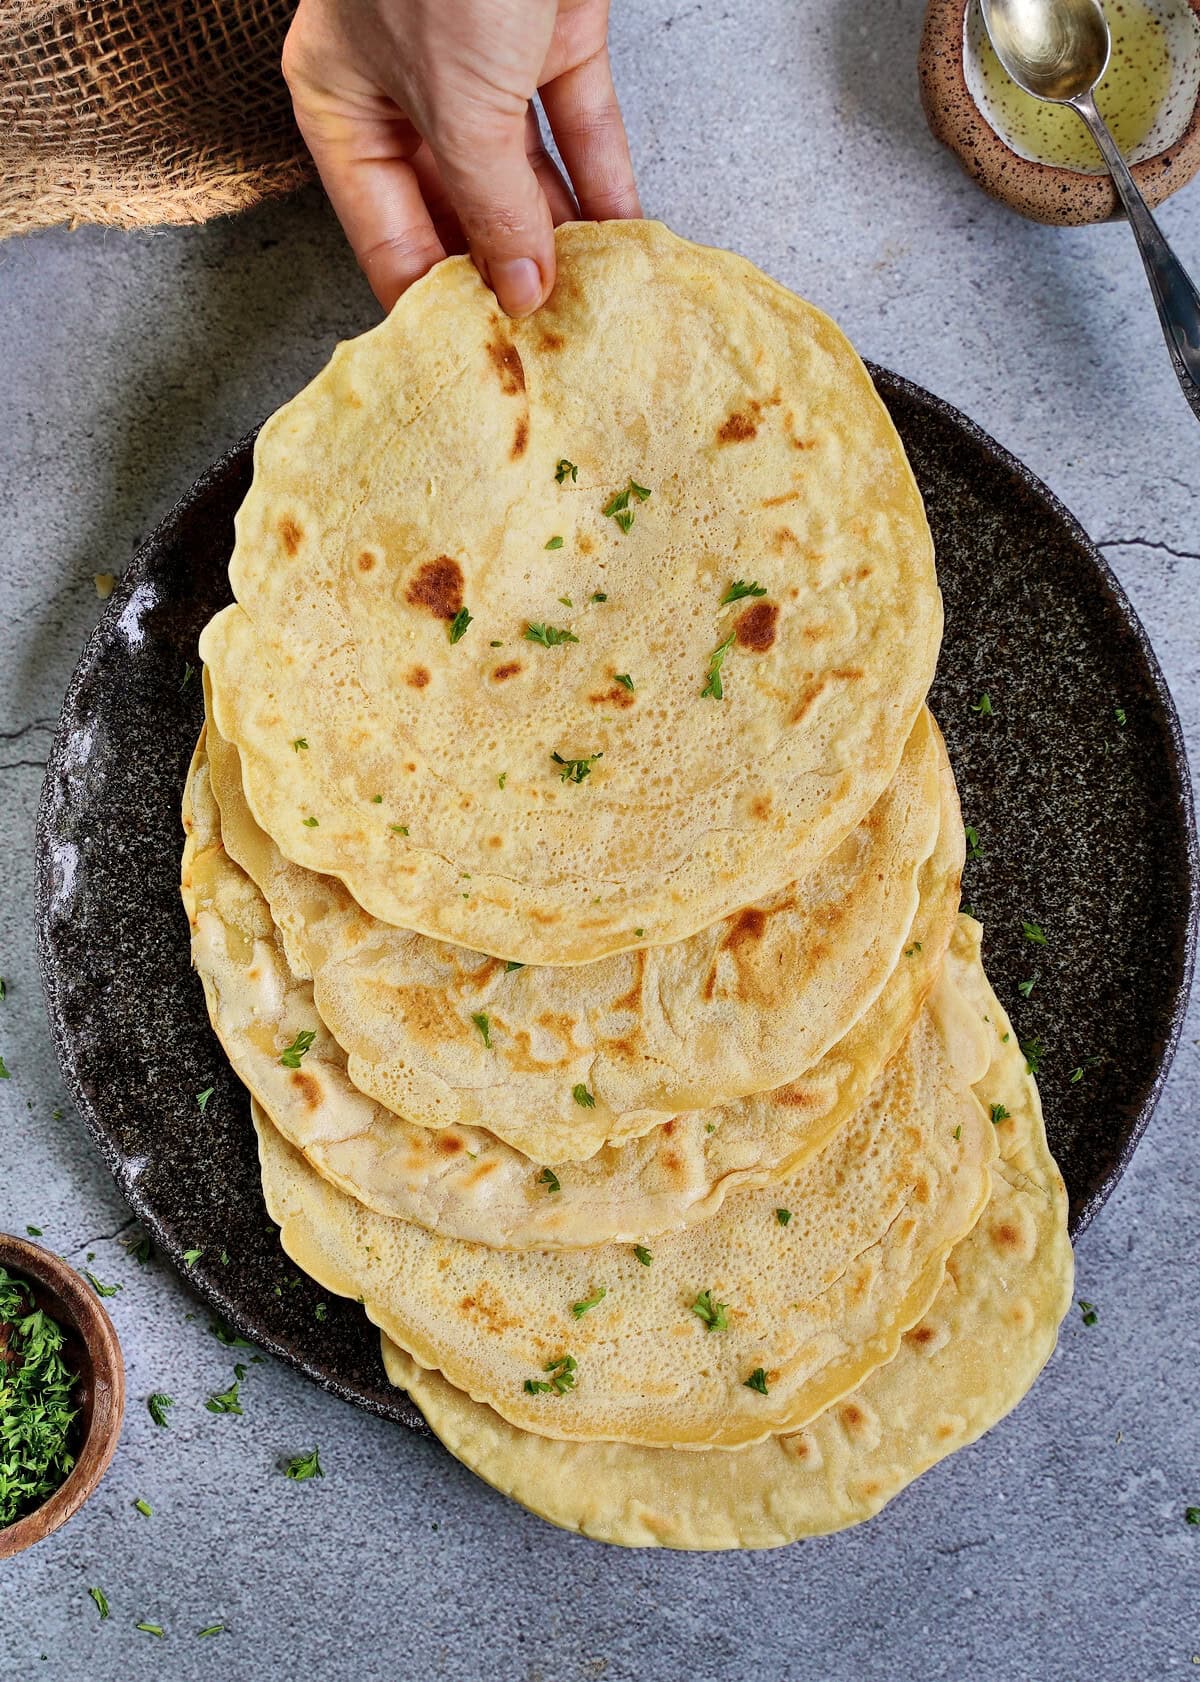
Stack cooked chickpea tortillas beneath a clean kitchen towel to trap steam and keep them soft.
How To Serve Gluten-Free Tortillas?
Enjoy homemade gluten-free tortillas as you would regular tortillas, including:
- Tacos/ fajitas (like lentil tacos or chickpea tacos) or vegan taquitos
- Egg rolls
- Burritos/ wraps (with fillings like vegan shawarma or hummus and vegetables)
- Lentil enchiladas
- Flatbread (as a pizza base or for mopping up stews, soups, and curries- like red lentil dahl or chickpea curry)
- Like crepes (with savory or sweet fillings, like chocolate spread or berry compote)
Storage Instructions
Store: Leave the homemade gluten-free tortilla wraps to cool, and stack in an airtight container, separated by layers of parchment paper, in the refrigerator for 3-4 days.
Freezer: Layer with parchment/ wax paper in a ziplock bag for up to 3 months. Thaw at room temperature (about 1 hour) or microwave wrapped in a damp paper towel for 30–60 seconds.
Reheat: In a non-stick pan for 20-30 seconds per side, microwaved for 20-30 seconds, or wrapped in foil in a stack in the oven (10-15 minutes at 350°F/175°C).
FAQs
How to flavor chickpea tortillas?
It’s easy to adjust this recipe for gluten-free tortillas with:
- Spices: Garlic powder, onion powder, paprika, chili/cayenne, cumin, turmeric, or seasoning blends (like curry powder or everything bagel seasoning).
- Flavor boosters: Bouillon/ stock powder and/or nutritional yeast (for cheesiness).
- Herbs: Dried Italian seasoning or fresh chives, scallions, parsley, cilantro, etc.
You can also make chickpea spinach tortillas for extra nutrients.
Are chickpea flour tortillas pliable?
Yes, they’re wonderfully pliable and tender, especially while warm.
Could I substitute the chickpea flour?
Buckwheat or quinoa flour may work. You might also like my gluten-free rice tortillas, oat tortillas, and low-carb almond flour tortillas.
Can I oven-bake the tortillas instead?
Yes, but they’ll be puffier and less pliable (better for flatbread or saucy enchiladas). Bake at 375°F/190°C for 10–14 minutes, flipping halfway. Then, cover with a kitchen/ tea towel to keep soft.
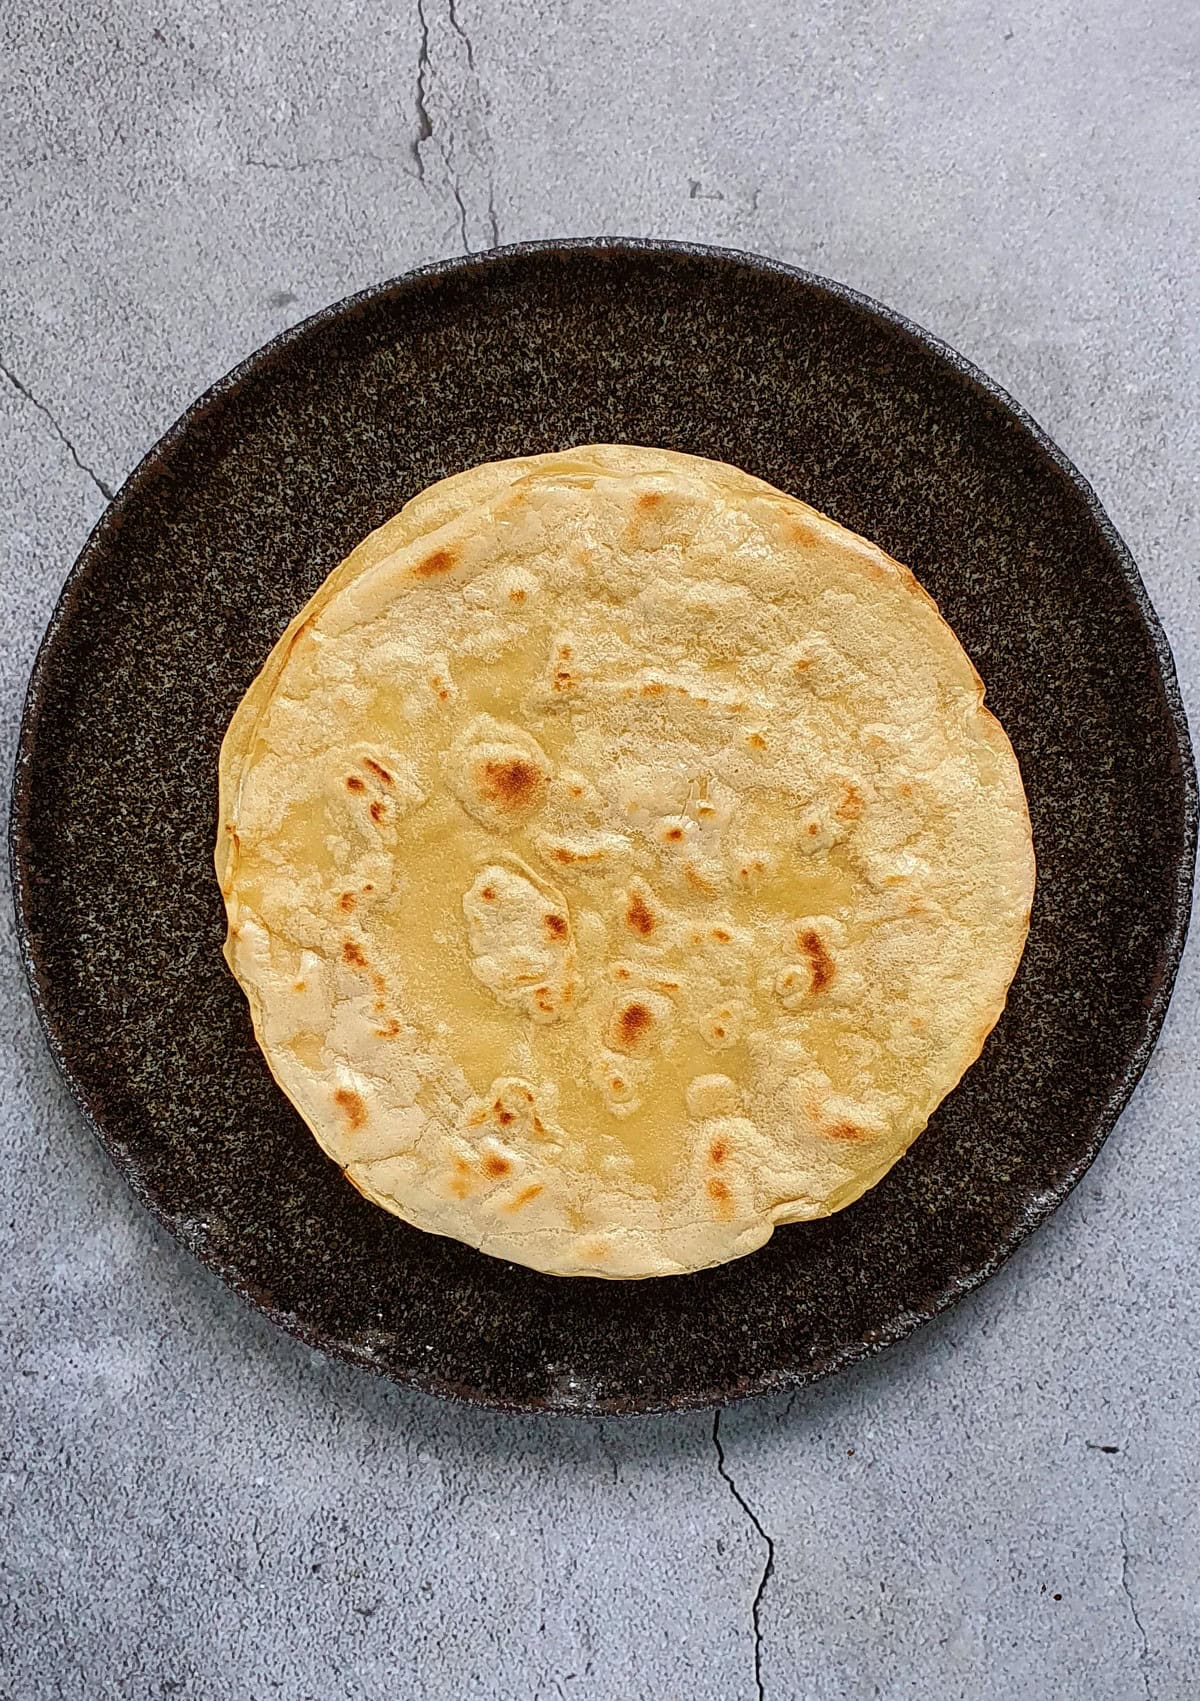
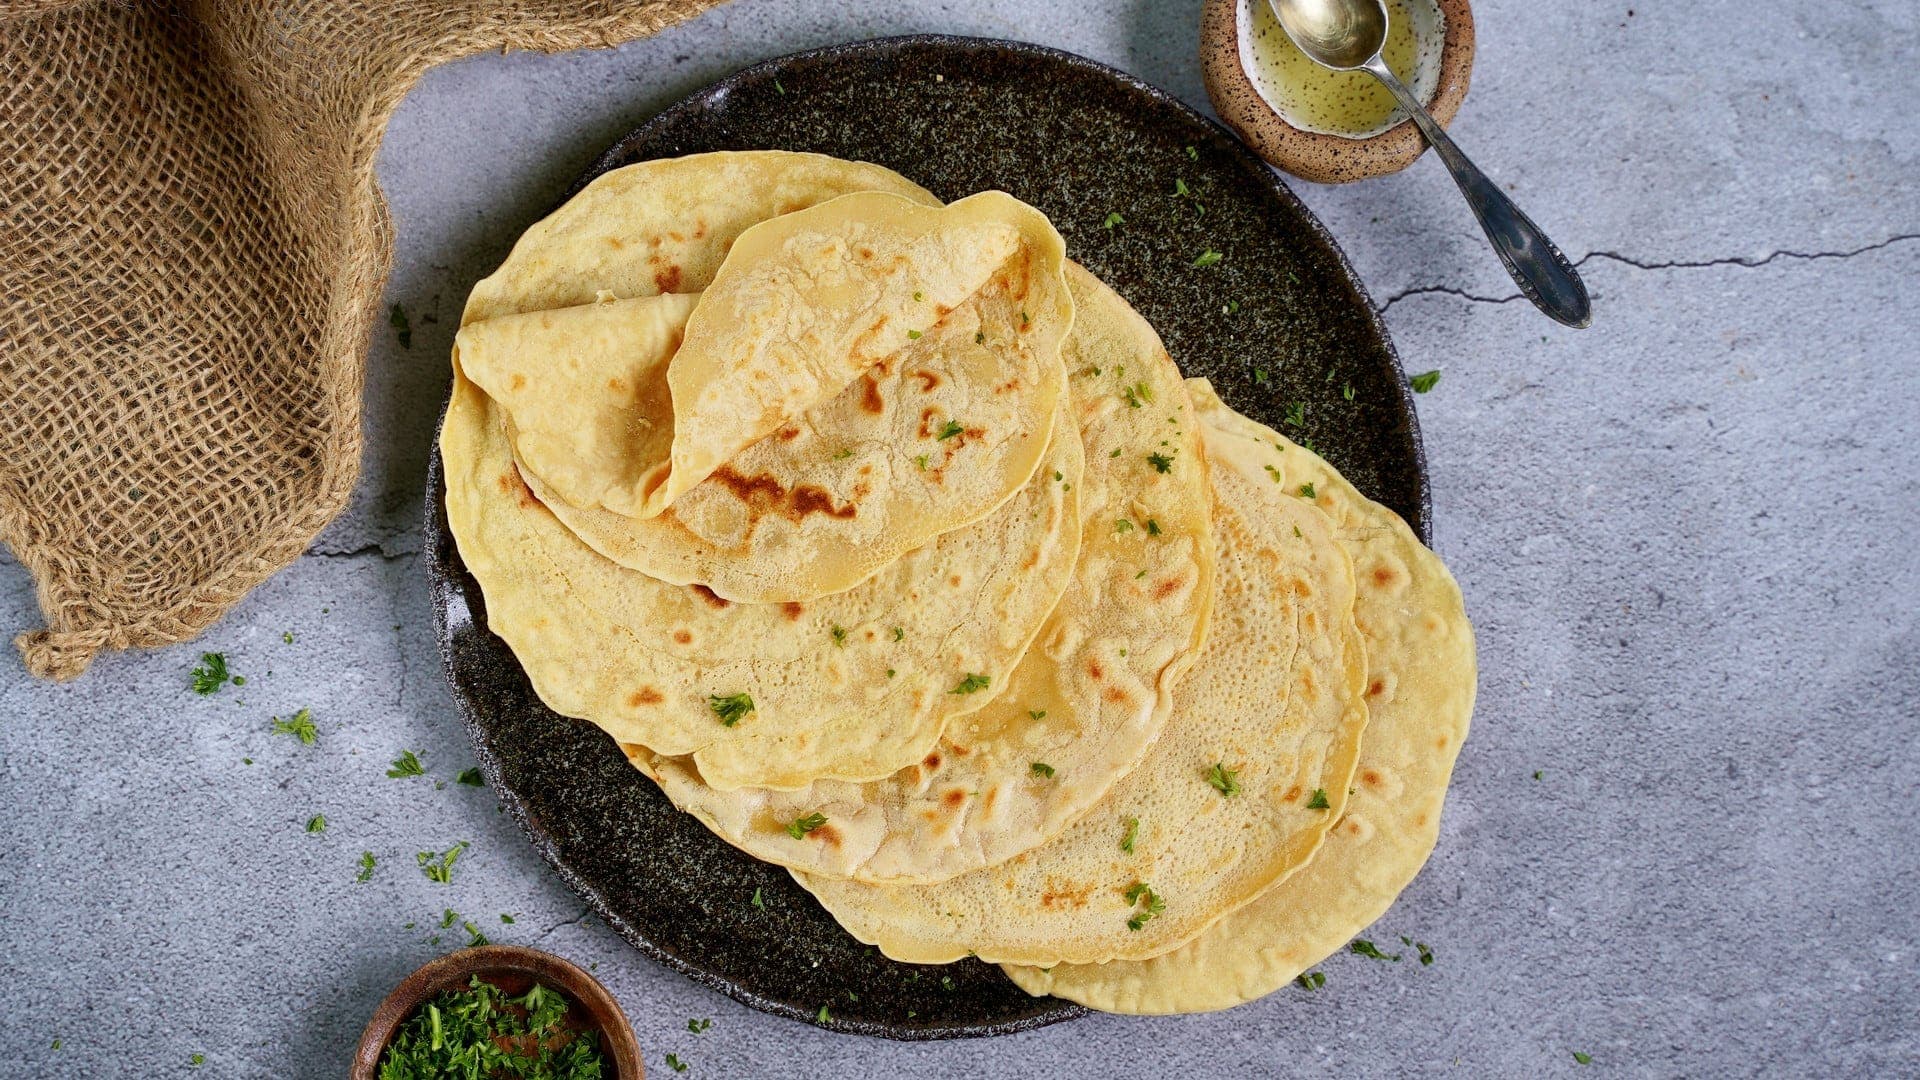
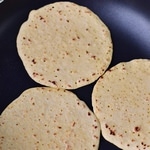
Here is a photo of the tortillas with just 3/4 cup (180 ml) of water, which I published in 2017:

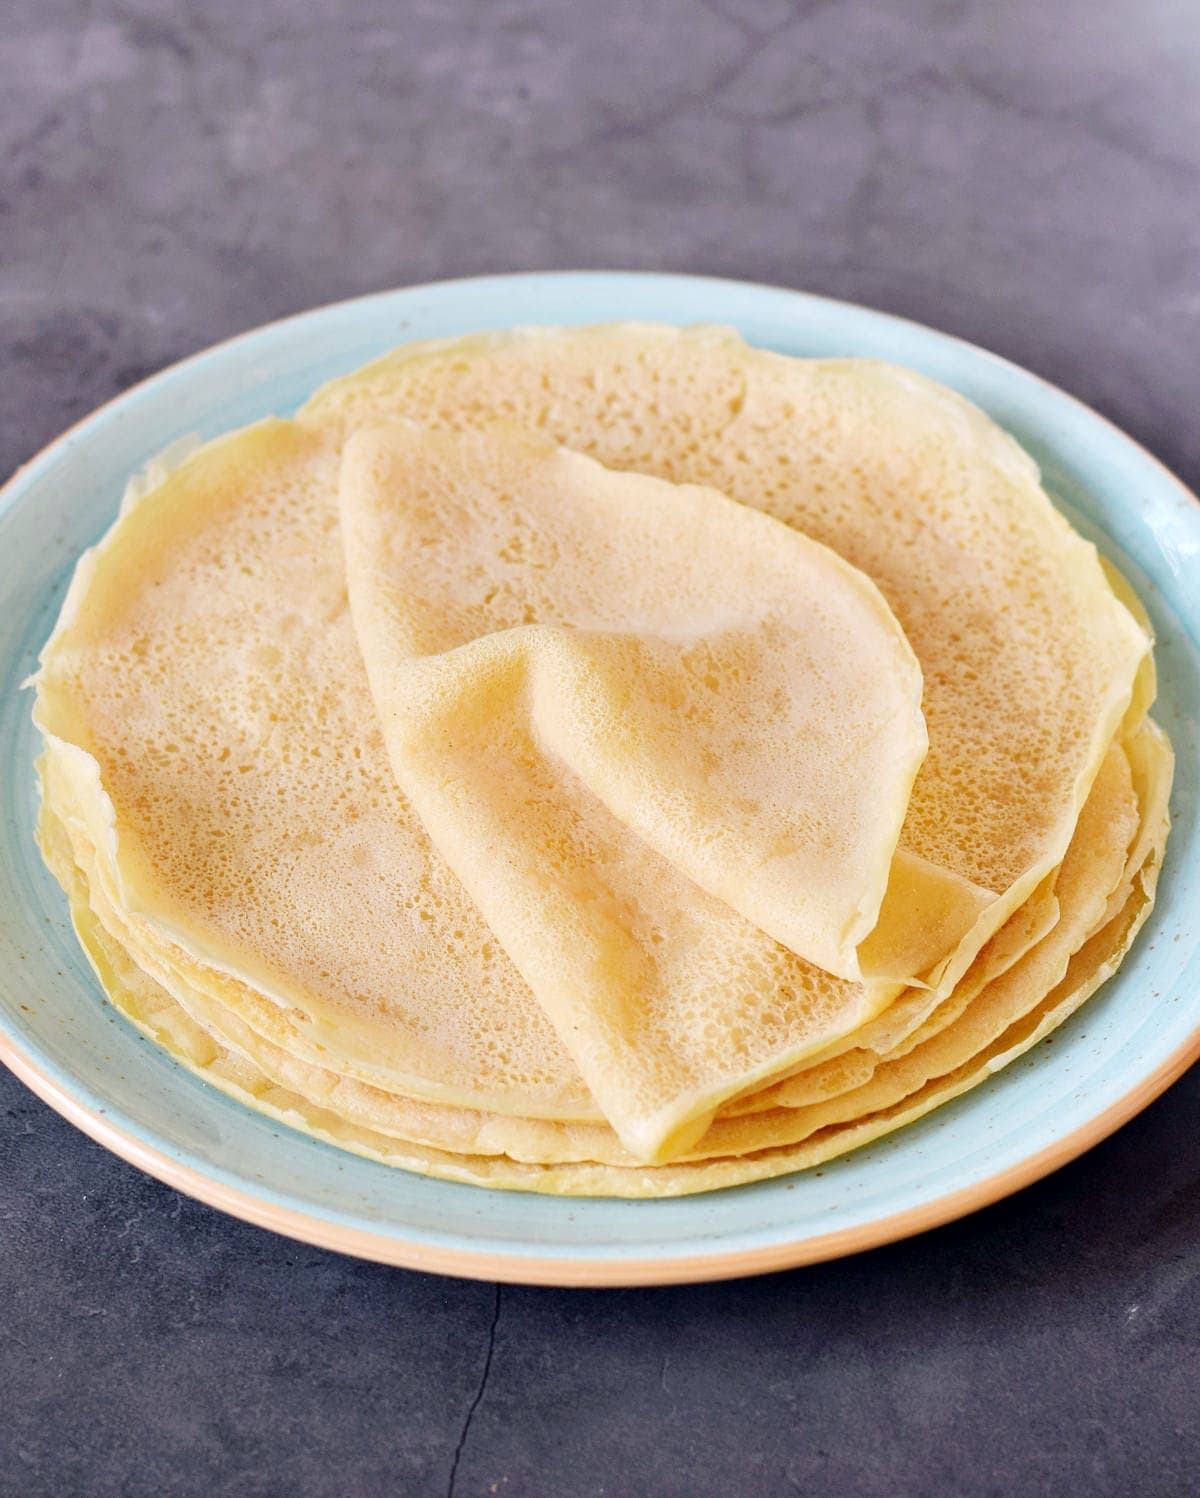
Here is a photo of thin crêpes that I made with the exact same recipe but with 1 2/3 cup (400 ml) of water:
Recipe Notes and Tips
- If you have time, rest the batter: To properly hydrate the flour and guarantee maximum flexibility.
- Cook a test wrap: Then, adjust the heat accordingly. High heat or overcooking leads to crumbly tortillas or gummy centers.
- Adjust the thickness: Add more water for thinner, crepe-like wraps.
You Might Also Like
- Gluten-free Bread
- Potato Flatbread
- Gluten-free Pita
- Gluten-free Naan
- Quinoa Bread
- Flourless Chickpea Bread
If you try this easy gluten-free tortilla recipe, I’d love a comment and ★★★★★ recipe rating below. Also, please don’t forget to tag me in re-creations on Instagram or Facebook with @elavegan #elavegan—I love seeing them.

Gluten-free Tortillas
Video
Ingredients
- 1 cup (120 g) chickpea flour (also called garbanzo bean flour)
- ½ cup (60 g) tapioca flour (see notes)
- 3/4-1 cup (180-240 ml) water
- ⅓ tsp salt
Instructions
- You can watch the video for visual instructions.Process the ingredients in a blender (or just whisk them together in a bowl). Use 3/4 cup of water for thicker tortillas (perfect for tacos). Add about 1 cup of water if you want to make thinner tortillas. You can use up to 1 2/3 cups (400 ml) for very thin wraps/crepes.
- Heat a little oil in a non-stick pan/skillet over medium heat. Pour about 1/3 cup into the pan/skillet (1/4 to 1/3 cup is a good size for a taco). If you plan to make enchiladas use more batter for each tortilla.
- Cook for two minutes on low-medium heat, flip the tortilla and cook on the other side for about one minute. Enjoy!
Notes
- Tapioca flour: You can also use arrowroot flour or potato starch instead of tapioca flour/starch. Some readers also had success with cornstarch (I prefer tapioca flour though).
- Storage: Let the tortillas cool completely. I recommend stacking them on a plate and putting some wax paper between the individual wraps so that they don't stick together. You can store them in the fridge for up to 3 days, ideally, wrap the plate in plastic wrap. The tortillas dry out a bit in the fridge, but you can easily reheat them individually in a pan (fry on both sides over a low/medium heat for about 20 seconds). Then they are soft and elastic/pliable again. It's also possible to freeze the tortillas!
- This tortilla recipe has been on my blog since September 2017 and has been updated on March 8th 2026 with new pictures and video.
Nutrition information is an estimate and has been calculated automatically
 „Simple and Delicious Vegan“ Cookbook by ElaVeganCLICK HERE to order!
If you are using Pinterest, feel free to pin the following photo:
Are these good for enchiladas? I’m looking for something that will hold together that’s not made from corn.
Yes, I use them always to make enchiladas! Here you can see my favorite enchilada recipe: https://elavegan.com/vegan-enchiladas-lentils-gluten-free/
Hello, Ela, I’m going to make these this afternoon for the eggplant quesadillas and can barely contain myself. I’ve been thinking about them all week. I was wondering if you’ve also tried this recipe for crepes by adding more water? Any suggestions?
Yes, that works pretty well! 🙂
Can I make these for my burritos then vacuum seal them and place in the freezer, and microwave when I want to eat it?
Thanks so much for your GF tortilla recipe. I’ve have missed tortillas since I went gluten dairy and egg free. I put them in a container when they were hot and they stayed perfect and soft and made the best
wraps! Thanks so much!
Thanks so much for your great feedback, Anna! I am so glad you like the recipe. 🙂
These are fabulous – thank you so much! Like so many others I’ve been looking for a quick and easy tortilla/wrap recipe and this is the ONE. The whole family gobbled them up on the first try! We’re all so excited to use them for lots of different styles of wraps – incredibly versatile with plenty of protein built right in. I can’t thank you enough!
PS – I used an iron skillet with just a little ghee. The key is to wipe your skillet between uses with a little oil to keep it fully seasoned. I keep my iron skillets in the oven and let them re-season almost every time I use the oven. Keeps them as good as a non-stick pan! Just thought I’d mention it for anyone who’s not sure what kind of pan to use. Thanks again!!! : )
That’s awesome, John! Thanks so much for your amazing feedback and helpful tip. 🙂
Super yummy and oh so easy – thanks!
That’s awesome, Maja! Thanks for sharing. 🙂
I just made these, measured in grams, non-stick skillet and they came out looking like pancakes. No brown bits at all. I was worried about cooking them longer because they were already starting to be crispy on the edges. Would an oiled cast iron pan maybe work better? I like the flavor and my son loves tacos. He’s 2 so he’s not going to say anything about this first batch, but I would like to get it right.
I am glad you liked the flavor, Amy! I normally only get the brown bits when I cook them longer. I never tried to make the tortillas in an oiled cast iron pan because everything I make in that skillet gets stuck, haha. But please report back if you give it a try! 🙂
Mine also did not have those brown spots all over and did look a bit like pancakes but tasted yummy. I cooked them in a cast iron skillet I’ve had for years but just yesterday learned how to properly care for. Worked my ass of and got some burns to try and get some serious old build up off. The edges need some more love but the bottom on the inside and outside are nice and smooth – and nothing stuck today!
https://youtu.be/RlMjBVajilc
Thank you so so much for sharing this recipe, my one year old and I have celiac disease and while I was fine without any bread type products his dr instead he have something. I just ground the beans and made this with the 3/4 C water and he ate 2 of them for lunch. Im going to make more but thinner after his nap to make pinwheels for his dinner. I cannot thank you enough for sharing this.
Aww, I am so glad you liked the recipe and that it’s helpful! I appreciate your feedback. 🙂
Thanks so much for sharing this fecipe, I
was looking for a good recipe and I can finally make delicious burritos from scratch. My family loved them!
So glad you and your family enjoyed this recipe! 🙂
Easy tortillas quick to make. Ready to fill as quesadillas
I am glad you liked the recipe, Karen! Thanks for your feedback. 🙂
Great gluten-free tortillas. Will definitely make again. Thanks for creating and sharing!
You are very welcome, Carolyn! It makes me happy that you like the recipe. 🙂
I have made these several times now, without fail. But Today I wanted an English muffin style bun, so I poured the batter into 3.5 inch English muffin rings, about 1/4 of a cup, and cooked for about 2-3 minutes. They were perfect for sandwiches! Thank you so much for this recipe!
I am so glad you love these gluten-free tortillas, Karen! Thanks for your great feedback. 🙂
Hey question how long does these last when you make them. How long can you keep them in the fridge.? Thanks
You can keep them in the fridge for up to 3-4 days but they tend to dry out, so it’s best to eat them right away (they taste best fresh). Keep them in the fridge covered and reheat in a skillet with a lid on for about 30-60 seconds (each side). Or you can cut the recipe in half if you want to make less.
Thank you so much for this recipe. I used the tortillas to make veggie fajitas and the whole family loved them – it’s not often everyone is so happy! I used corn flour/starch in place of the tapioca (as that’s what I had in my cupboard) and it worked a treat. And they folded!!!!! The first GF tortillas I’ve ever had that do this. A definite make again here X
Amazing! I am so happy you loved the recipe! Thanks for your great feedback, Amy. 🙂
This sounds great. My question is, is the tapioca flour or arrowroot flour necessary? Could ground flaxseed or chia seeds work incorporated or as a sub for either flours ?
Thanks for sharing this neat recipe!
Hi Tarah, yes, it is necessary for the texture and to make the wraps pliable. I am not sure if flax or chia would work as good. 🙂
I simply LOVE this recipe and I have made it for friends who are not vegan and not gluten-free and they prefer it to traditional store-bought tortillas.
Some lessons learned (as I’ve made these twice a week since I discovered your recipe… thank you, btw!)
If you put too much batter in the frying pan, you get something that resembles a crumpet, which might be good for breakfast but not so good for wrapping.
The pan makes a difference…. I tried with 3 different and new frying pans that were actually bought (and 2 of them returned) because they didn’t cook this properly… can you tell I’m almost addicted to these???!!!??? I ended up with a ceramic 10″ frying pan that works wonders. The cast iron pan was a disaster. My old Teflon pan thrown out.
It’s super important to have a hot pan and be prepared when you add the batter…. get ready to swirl it quickly to fill the frying pan… again, you want thin so you don’t get “crumpets”.
Thank you so much Ela for sharing this recipe. It has literally changed my life !
Hmmm… sorry, I don’t know how to edit my response but I wanted to update: I accidentally made my first batch with 1 cup of water and apart from putting too much batter in the frying pan which made “crumpets”, now that I know not to put too much batter in, 1 cup of water is perfect for us.
For those people who say the recipe is too dense, try 1 cup of water… just remember hot pan, and not too much batter (for a 10″ pan 1/3 is best in my book) and swirl it as soon as you pour it in… big blob of batter in the middle of the pan and quickly spread it out to the edges… then cook like a pancake…. perfect every time once you’ve perfected the technique 🙂
So…. if you want “crumpets” (google it if you don’t know what they are!)… try pouring thicker… I don’t know how much I poured the first time, so I can’t say how much to pour… but it’s another fantastic way to use this recipe!
Amazing and helpful tips! Thank you, Carol! 🙂
You are awesome, Carol! Thanks so much for taking the time to leave such fantastic feedback! I am very happy you love the recipe! 🙂
I tried with two different pans without success. They both stuck. I did not use any oil. Is there a specific pan that you can recommend?
Hey, Donna! I would also recommend a ceramic pan and adding a little oil does help. 🙂
I was so excited to find gluten free wraps in the store. Until I tried eating one. Not only did they crumble all over the place, they had the taste and texture of play dough. It might seem over the top, but I nearly wept when I tried these as my first burrito … SO easy to make. Pretty cheap and it was absolutely delicious. And it’s flexible! So glad I found this and thank you for posting it.
You are very welcome! I am so glad you liked the recipe, Jay! 🙂
Thank you soooo much for this recipe! This is a game changer for me! I thought I have to minimize my use of tapioca starch, so I used potato starch, & it still worked out great! Also used slightly higher heat. My mind is whirling with all the possibilities! I am so grateful!
That’s wonderful! Thanks a lot for your amazing feedback, Kimberly! 🙂
Hi Ela, thank you so much for your reciepe! Like everyone else who has thanked you I’m delighted with the results. However I had to purchase Gram Flour as its called here in Ireland which I’m assured by my local Health Store is Chickpea flour. I added much more water though as I was making wraps and wanted them thiner. I thought maybe thinner might have made them weaker but I was wrong! They are very flexable and held all the ingrediants in as they are so strong and supple! Gonna make a batch this week and freeze them so I can pull one out as I need them for lunch and such. My husband (who has no diet restrictions) said they are nicer than the shop bought ones! Thanks again Ela!
Awesome! Thanks so much for your thorough feedback, Liz. 🙂