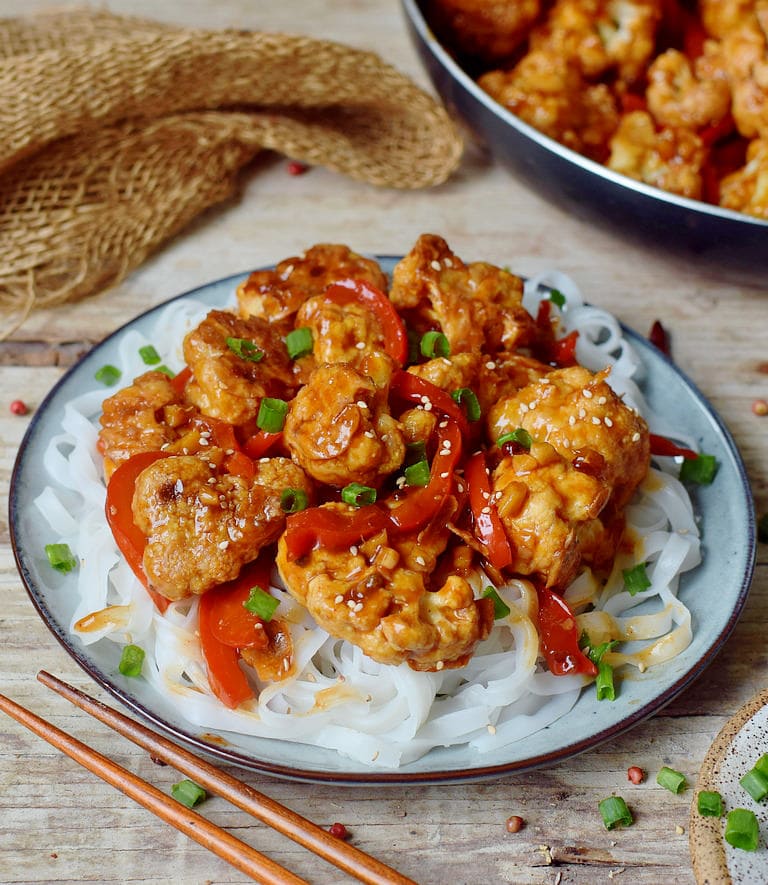
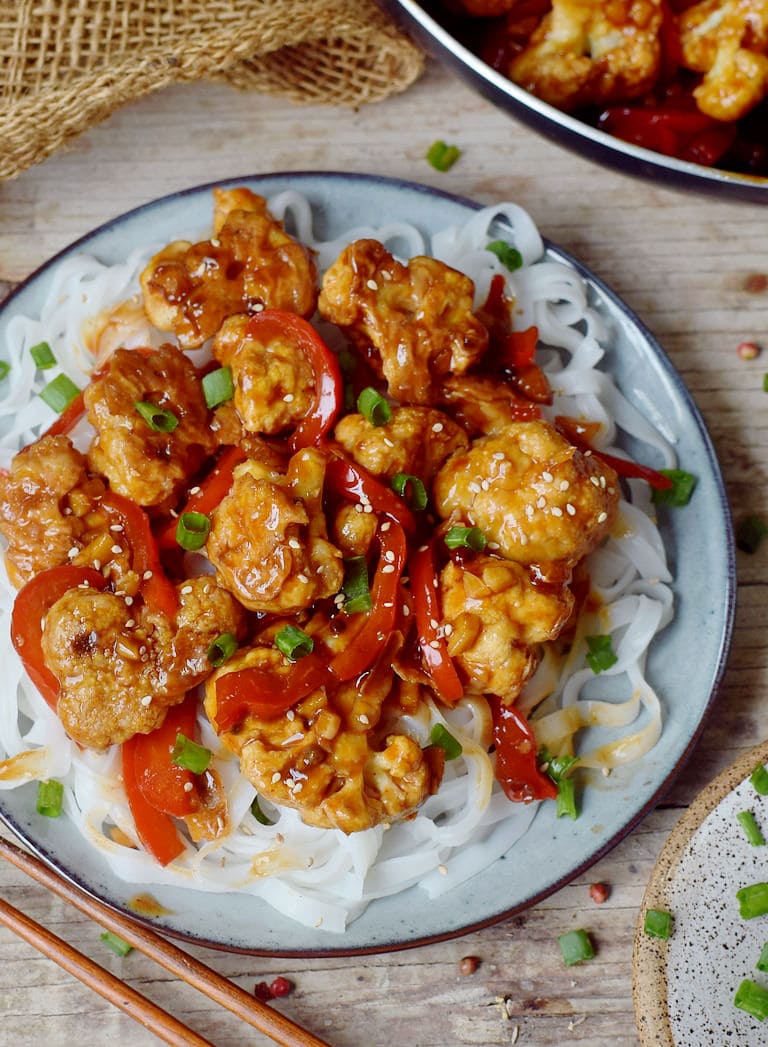
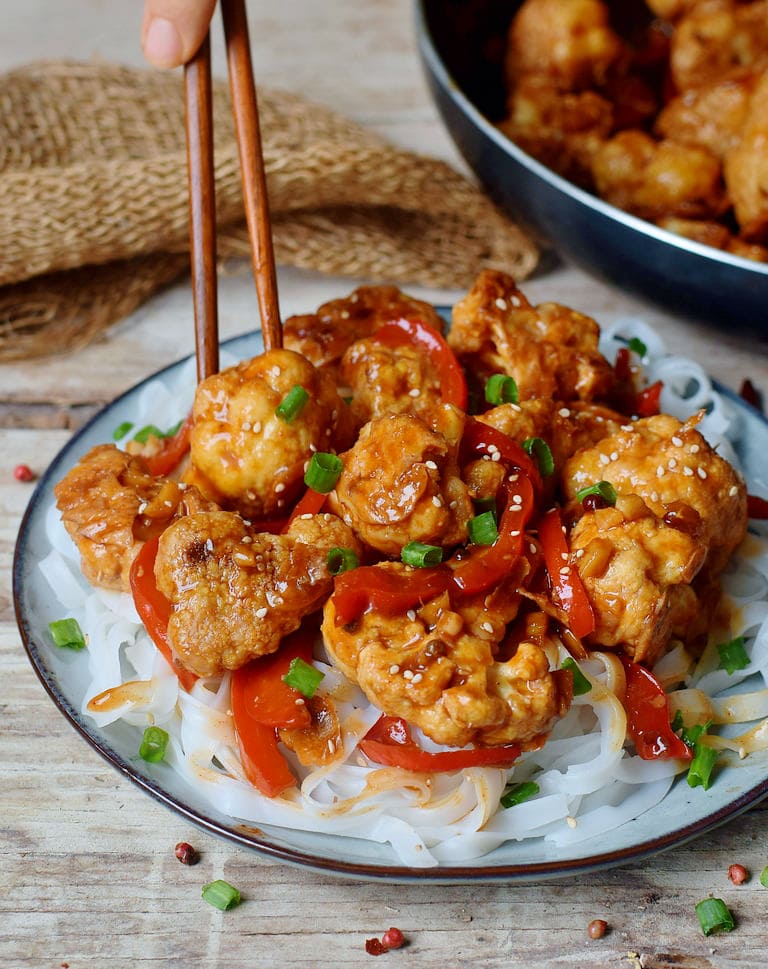
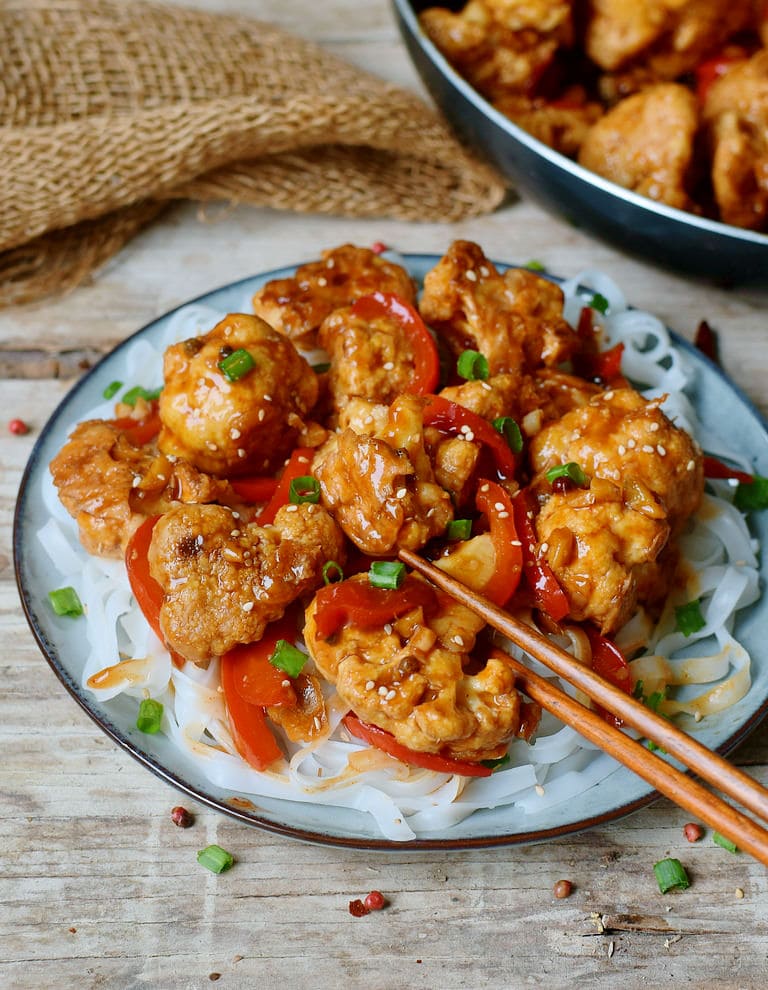
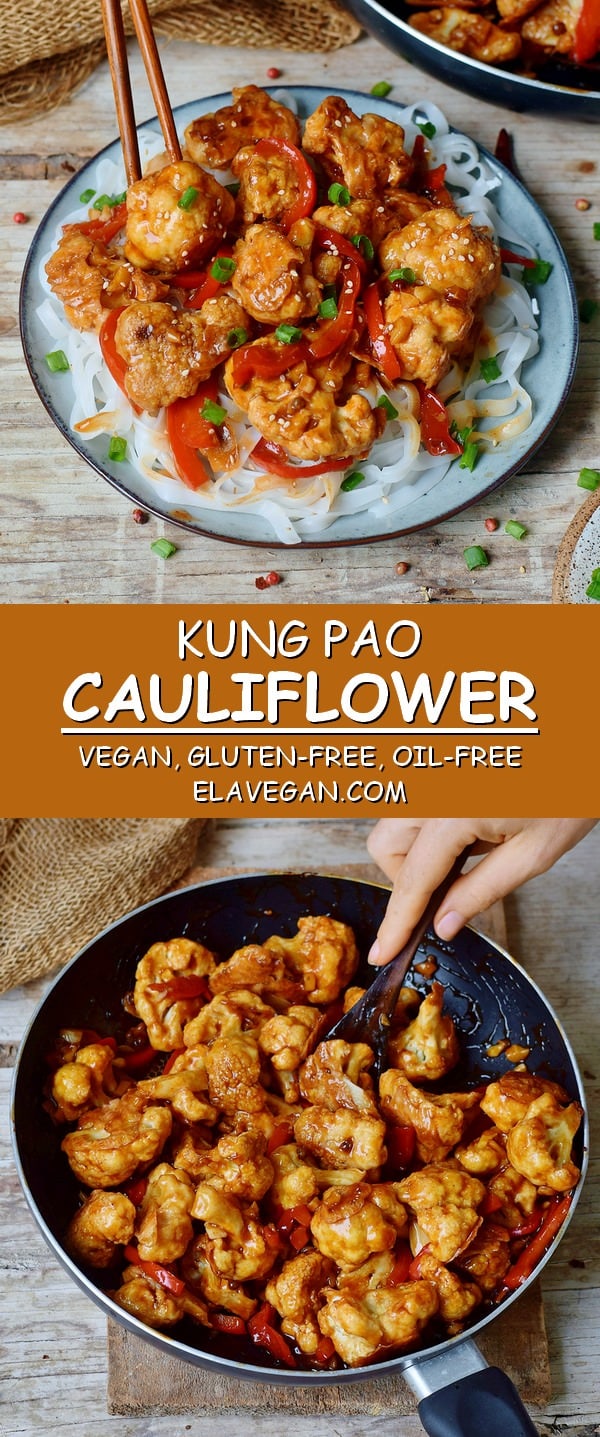
This Kung Pao Cauliflower is a delicious stir-fry that is spicy, hearty, satisfying, and comforting. It’s a great meat-free Chinese takeout alternative to Kung Pao Chicken! The Kung Pao sauce has the perfect combination of spicy, salty and sweet flavors which will make your mouth water. The recipe is vegan, gluten-free, low in fat and calories, and can be made oil-free!
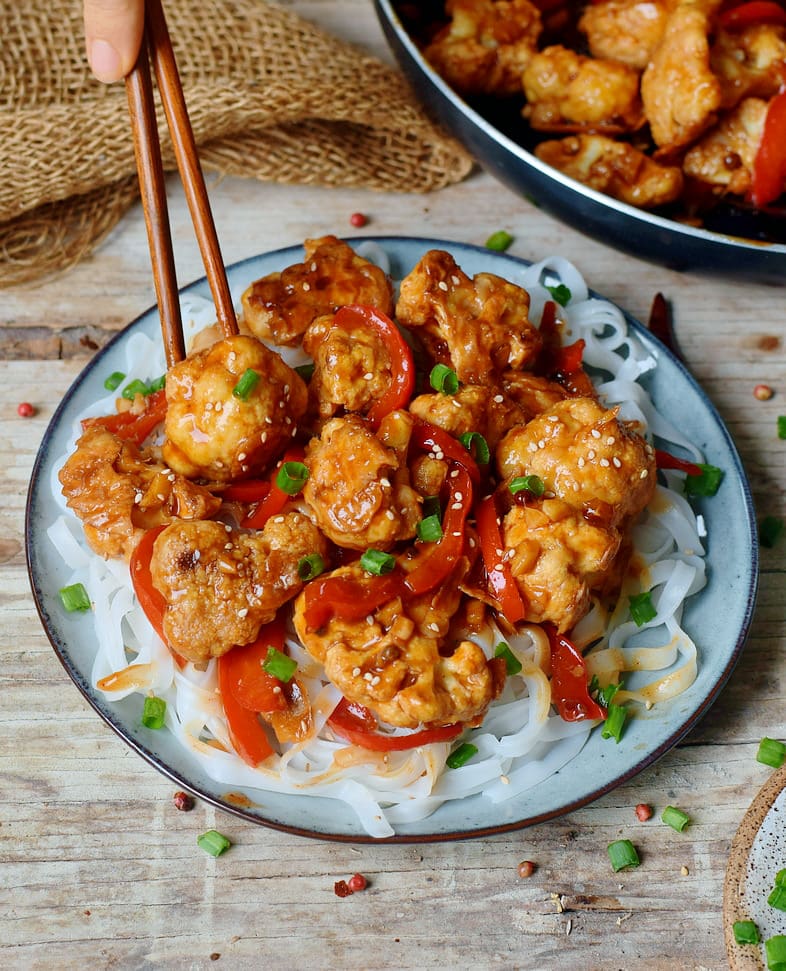
Kung Pao Cauliflower Stir-Fry
Hello dears, I am excited to share my first vegan Chinese recipe with you! I must admit that I wasn’t the biggest fan of Chinese food in the past. The salty/sweet combo tasted weird to me but my taste buds have changed and now I LOVE this flavor combination.
That’s why I have been busy in my kitchen lately, trying out different Chinese recipes. And this is the first one! Kung Pao Cauliflower – and let me tell you, I simply adore it and so does my boyfriend! Why should you give it a try? Because it’s…
- Packed with spicy, salty and sweet flavors
- A great meat-free alternative to Kung Pao Chicken
- Easy to make with simple ingredients

How To Make Kung Pao Cauliflower?
This recipe has only 8 steps which are easy to follow and not complicated at all. First, you allow the cauliflower a nice cozy bath in a batter made from chickpea flour, cornstarch, soy sauce, and water. While the cauliflower florets bake in the oven you can fry the bell pepper, garlic, fresh ginger and peppercorns in a skillet. Your kitchen will smell amazing!
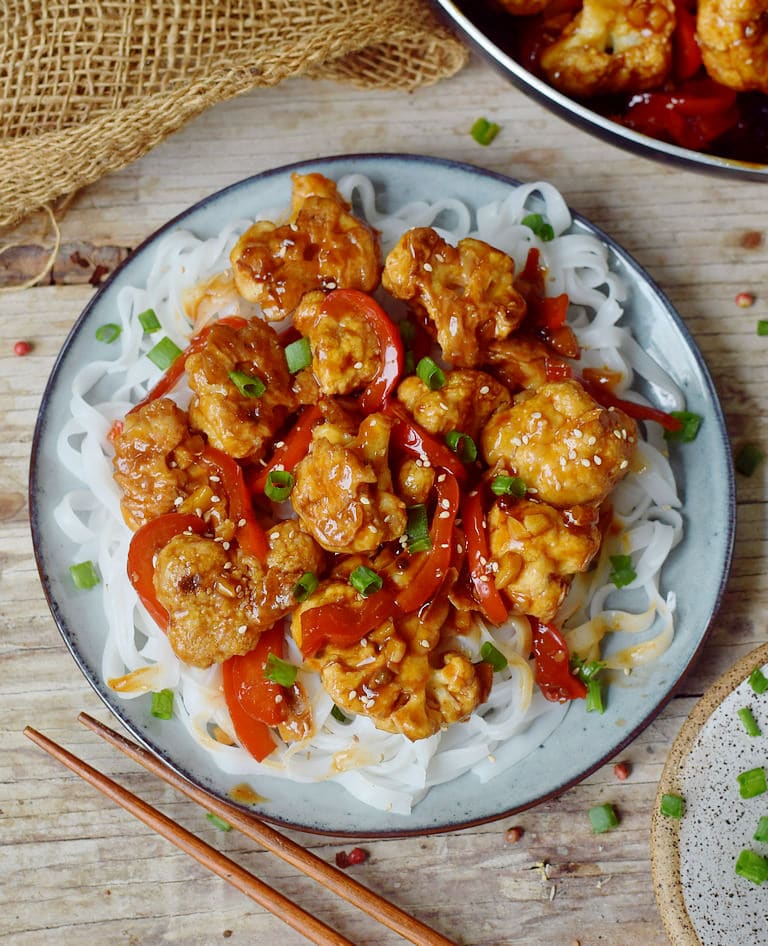
You can serve the vegan Kung Pao with rice or rice noodles (both taste amazing!) and can prepare it according to the package instructions while the cauliflower is in the oven.
Meanwhile, you can also start making the spicy Kung Pao sauce which takes literary just 60 seconds. All you need to do is, combine all sauce ingredients in a bowl and whisk. Then pour the sauce into the skillet, bring to a boil, and allow it to simmer for one minute.
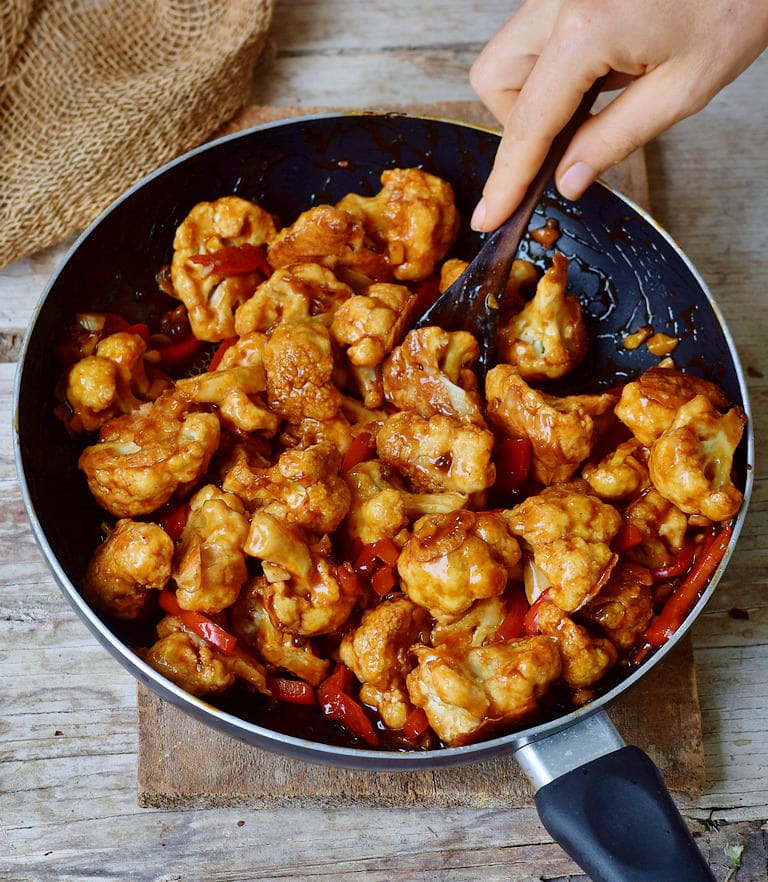
Finally, add the roasted cauliflower to the skillet and give it a good stir. You can enjoy it right away. However, if you want the cauliflower to be crispy, transfer it back to the oven for a further 10-15 minutes! Check the easy instruction pictures below:

What about Kung Pao Tofu?
This spicy Kung Pao can be made with either cauliflower or tofu. I don’t eat tofu very often but if you want your Kung Pao to be packed with lots of plant-based protein you can use tofu. How to make Kung Pao Tofu?
The sauce and the ingredients for the skillet are the same but you can skip the baking part. Instead, you will need to press the tofu for about 15-20 minutes, slice it into cubes and fry it in a pan until nicely brown. You can try out both versions and let me know which one you preferred. 🙂
Spicy Kung Pao
Do you love spicy food? I know it’s super healthy and I like spicy food as long as it’s not too spicy. Yesterday I ate a whole dried chili (yes, the whole chili with the seeds) and almost fainted, haha. It was too much for my tastebuds. You can make this Kung Pao with 4-6 dried chilies which you can fry with the garlic, ginger, peppercorns, and bell pepper.
However, I would suggest removing the chilies before you pour in the sauce. If you don’t have dried chilies, simply use 1/4 teaspoon (or more) cayenne pepper. Not a fan of spicy meals? Leave it out completely for a mild Kung Pao Cauliflower.
Does it keep?
Yes! Leftovers can be stored covered in the fridge for up to 4 days. Simply reheat in a pan/skillet.
You Will Love This Kung Pao Cauliflower. It’s:
- Vegan
- Gluten-free
- Spicy
- Sweet & Salty
- Satisfying
- Comforting
- Easy to make with simple ingredients
- Perfect for a weeknight dinner
- And it can be made oil-free
A Few Helpful Tips
- Serve it with Jasmine rice, Basmati rice or rice noodles
- Double the batch and store leftovers in the fridge for up to 4 days
- Use tofu instead of cauliflower for a protein-rich variation
Should you recreate this tasty spicy Chinese stir-fry, please leave a comment below and don’t forget to tag me in your Instagram or Facebook post with @elavegan and #elavegan because I love to see your remakes! If you love spicy food, definitely also check out the following vegan spicy recipes:

Kung Pao Cauliflower
Video
Ingredients
Batter:
- ½ cup (60 g) chickpea flour (*see recipe notes)
- 4 tbsp (30 g) cornstarch
- ½ cup (120 ml) plant-based milk
- ½ tbsp soy sauce (*see recipe notes)
- 1 medium (600 g) head of cauliflower cut into bite-sized florets
Sauce:
- ½ cup of (120 ml) water
- 3 tbsp soy sauce (*see recipe notes)
- 2 tbsp rice vinegar
- 2 tbsp maple syrup (*see recipe notes)
- 1 tbsp cornstarch
- ½ tsp smoked paprika
- 1/4-1/3 tsp cayenne pepper OR 4-6 dried chilies (*see recipe notes)
For the skillet:
- 2 tsp oil or water
- 4 cloves garlic minced
- 1 tbsp fresh ginger minced
- ¾ tsp peppercorns (optional)
- 1 small/medium bell pepper sliced into fine strips
- 1 tsp sesame seeds
- fresh chives chopped
- peanuts (optional)
Instructions
- This recipe has a video for easy visual instructions.
Batter:
- Preheat oven to 425 degrees F (220 degrees C) and line a large baking sheet with parchment paper. In a large bowl whisk together cornstarch, chickpea flour, plant-based milk, and soy sauce. Let it sit for about 1 minute, then add the cauliflower florets.
- Toss until all cauliflower florets are coated with batter. Transfer the cauliflower to the prepared baking sheet and bake in the oven for about 20 minutes
Skillet:
- Heat oil (or water) in a skillet over low to medium heat, add garlic, ginger, peppercorns. Saute for 1 minute, stirring frequently to avoid burning.
- Next, add bell pepper and saute with a lid on for a further 5-6 minutes, stirring frequently. Add more water if necessary (I used 1 tbsp).
Sauce:
- Meanwhile, prepare the sauce. In a medium/large bowl, combine water, soy sauce, rice vinegar, sugar, cornstarch, smoked paprika, and cayenne. Whisk.
- Pour the sauce into the skillet. Bring to a boil and let simmer on low heat for 1 minute. Add the roasted cauliflower florets and toss to coat.
- Transfer back to the baking sheet and bake for a further 10-15 minutes if you like the cauliflower to be crispy OR enjoy immediately.
- Serve with rice or rice noodles. Garnish with sesame seeds, fresh chives and peanuts (optional). Enjoy!
Notes
- Chickpea flour alternative: I would suggest using gluten-free all-purpose flour (or regular flour if not gluten-free) instead of chickpea flour (haven't tried it out though).
- Soy sauce: Use gluten-free if needed or tamari or coconut aminos. You can also use low-sodium soy sauce.
- Sweetener: You can use a sweetener of choice, e.g. maple syrup, coconut sugar, brown sugar, etc.
- Use 1/4 teaspoon (or more) of cayenne pepper OR 4-6 dried chilies instead. If you prefer dried chilies, add them to the pan and fry together with garlic, ginger, peppercorns, and bell pepper. Then remove the chilies before you pour in the sauce, otherwise, the Kung Pao will be too spicy!
- Make sure to also check out my Sticky Teriyaki Tofu recipe.
- Recipe serves 2. Nutrition facts are for one serving (without rice or rice noodles).
Nutrition information is an estimate and has been calculated automatically
 „Simple and Delicious Vegan“ Cookbook by ElaVeganCLICK HERE to order!
If you are using Pinterest, feel free to pin the following photos:
Great dish.
So glad you liked it!
This was a huge hit for my family tonight! My son made the batter and sauce with me, which was fun and I think made him even more invested in the meal. We had it with a tofu fried rice and will definitely make this recipe again in the future!
That sounds amazing, Josephine! I’m so glad your family enjoyed it! Cooking together really makes it extra special. Tofu fried rice on the side sounds like the perfect combo. Thanks so much for sharing! 😊
Will definitely make it again. Very good.
So glad to hear that – thank you! 😊 Happy you liked it, Tannis. 💛
Tried this and I love it. I’m making it again but experimenting with Brussels sprouts as well as they need using up. Do you think it would also work with halloumi?
Hi Tracey, that sounds like a delicious twist! Brussels sprouts should work beautifully alongside the other ingredients. I haven’t personally tried it with halloumi since I’m vegan, but I imagine it could work well.
Hi Ela! I’ve enjoyed this a few times. How do you stir the bell peppers with the lid on? Is it OK to remove it a few times, or should I be swinging the pan with the lid sealing it? Thanks for your recipes!
Hi Howie, I am glad you like it. Yes, remove it a few times. You can see it in the video. 🙂
We found that the batter ran onto the sheet, baked onto the sheet and created a kind of ‘platform’ that then burnt…..
I just did this recipe and wow thank you so much! it is really easy and I had everything already so satisfying to have such an easy weeknight dinner on hand. I was kinda out of idea with the cauliflower, didn’t want to make any classic gratin or soup and there you pop up in my Pinterest 😍 so nice! I love Asian food and especially when it is homemade it tastes always so much better!
well one last thing I didn’t have bell pepper so I used beautiful colored carrots cut in the Asian way, in diagonal and was put of corn starch so I used tapioca starch. 😊
this recipe is directly going to my favourites
That’s wonderful. Thanks for your great feedback. 🙂
Your recipes are spectacular, thank you. unfortunately I’m unable to view / locate the video. can you help?
No worries, the recipe video is now embedded in the recipe card. There is a green button on top of each post that says “Jump to Video”. If you click it, you will skip right to the video. I hope this helps!
Hi there, I made this for dinner for my vegan daughter, we all thought it was very tasty ( incl my meat eating husband) but I thought the batter was very thick. Next time I would add a bit more water. Thank you!
You are very welcome, Joanne. 🙂
Agree with making it a bit more thick.
Very tasty! Trying with tofu tonight
https://pin.it/4Jeh49Z
Made this tonight and it was amazing! Used gluten free flour in the batter, sriracha sauce for the spiciness, and cashews instead of peanuts. Next time I won’t return it to the oven and maybe make some extra sauce. Now one of my favourite recipes.
That’s great, Alky! Thanks for your amazing feedback. 🙂
We just made this for supper–we went step by step, skipped the second bake round and it literally came out perfect. The chickpea flour is such a great choice for the batter and they came out perfectly crisped but a little firm. My kids rated this a 10/10 and asked me to put it in our family cookbook of favorites. It was absolutely delicious and the smell was divine. Thank you so much for the wonderful recipe–I can’t wait to try more of your amazing recipes..
That’s so good to hear, Anastasia! Thanks for your amazing feedback. 🙂
I had everything on hand, and this was amazing. Love how the batter gave some depth to the cauliflower. I look at your blog often, and both recipes I made were a win. Thanks!
Wonderful! Thanks for your lovely feedback, Katie. 🙂
Hey I’m making this dish rn and the batter keeps coming out too thick and I’m following the recipe to the t I’m thinking adding more milk to thin it out but I’m not sure
Yes, just add more milk. 🙂
Excellent flavour! Delicious! Just a few adjustments…..I would suggest making an extra batch of just the sauce’ especially if serving rice noodles. The cauliflower soaked up all the deliciousness. Also, this is great for maybe a small head of cauliflower, so adjust accordingly.. Can’t go wrong with extra sauce! I used the convection setting on my oven and used the top rack….perfect????????. Definitely making again!
Thanks for your feedback, Kelly! 🙂
The flavors were good but it did not come out crispy at all, even with the extra time in the oven, just soggy ????
Sorry to hear you didn’t like it, Candice. 🙂
I have made this twice now. It was great! I didn’t do the step where you put it back in the oven when second time — didn’t think it needed it. Also, I think I like it better without the smoked paprika. This is a great recipe!!! Thank. You.
That’s wonderful, Christina. Thanks for sharing. 🙂
Delicious! I subbed all purpose GF flour for the chickpea flour and arrowroot starch in the sauce. So yummy! Will make again!
Sounds great! Thanks for sharing. 🙂
These are sooooo delicious and filling! My husband recently went onto a vegan diet and has been wanting to stick to a certain website’s recipes initially…they are not super flavorful and I was still hungry all the time. This was so flavorful and I was happily full after and didn’t even finish the whole serving! I’m super excited to try more of your other recipes.
That’s awesome, Amanda! I am so glad they turned out filling and delicious. 🙂
Looks amazing! I’m planning on making it next week! One question..I just found out that I have a food sensitivity to bell peppers, do you think it would be OK to leave them out? Or could I substitute with some thing else? Thanks for the great recipe!
Use your favorite roasted veggies of choice. 🙂
This was the first recipe of yours that I’ve made and let me say, Thank you!! I’ve been following you on Instagram. Everything you always posts looks so great. I had a head of cauliflower that I needed to use asap so I checked your blog for inspiration!
Danke! I can’t wait to try another recipe! My boyfriend was literally licking his plate! Prost!
Wow, that’s such a sweet compliment! Thanks for your great feedback, Terra. I am glad you and your boyfriend liked the dish. 🙂