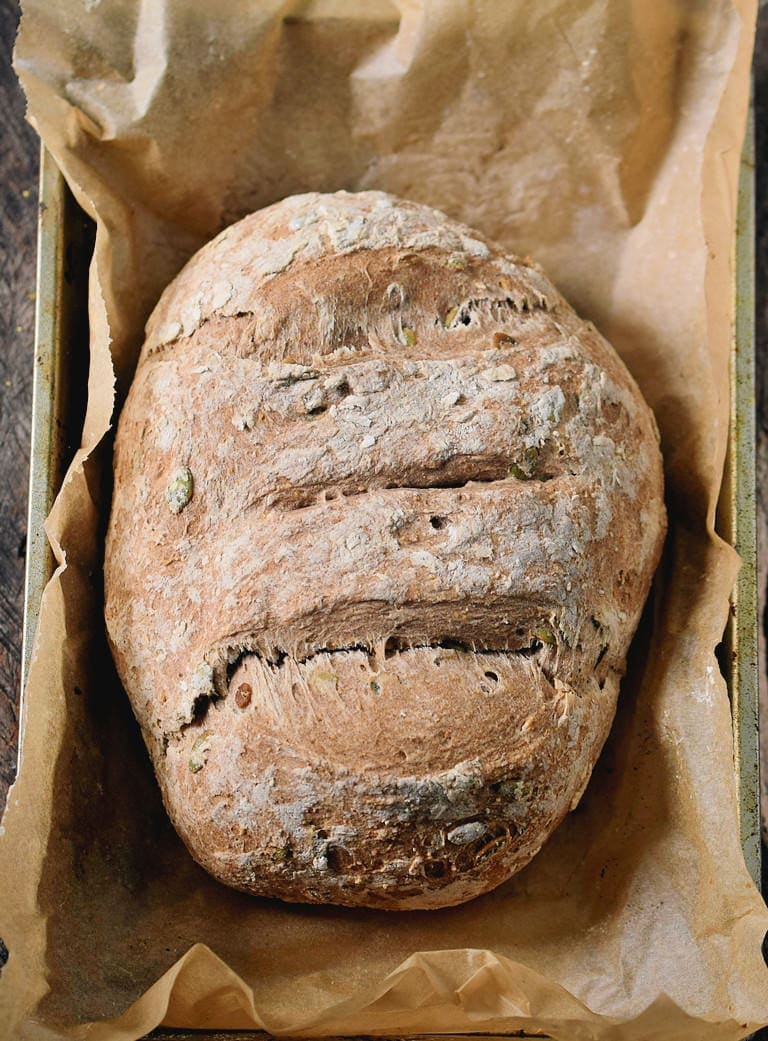
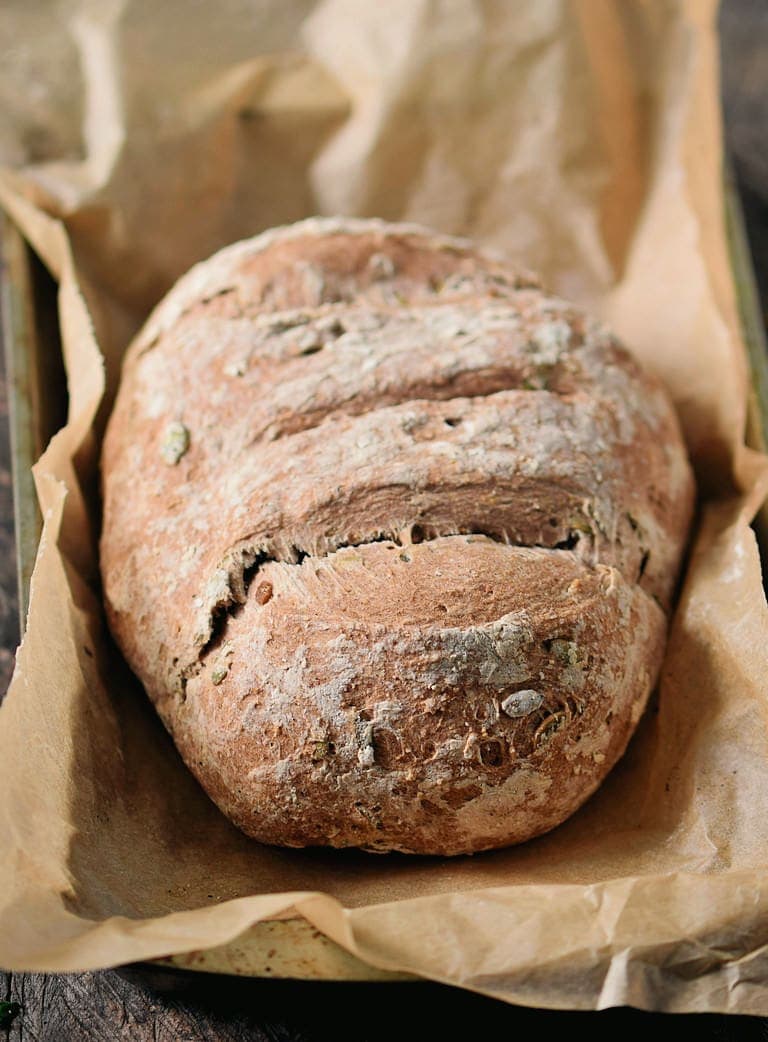
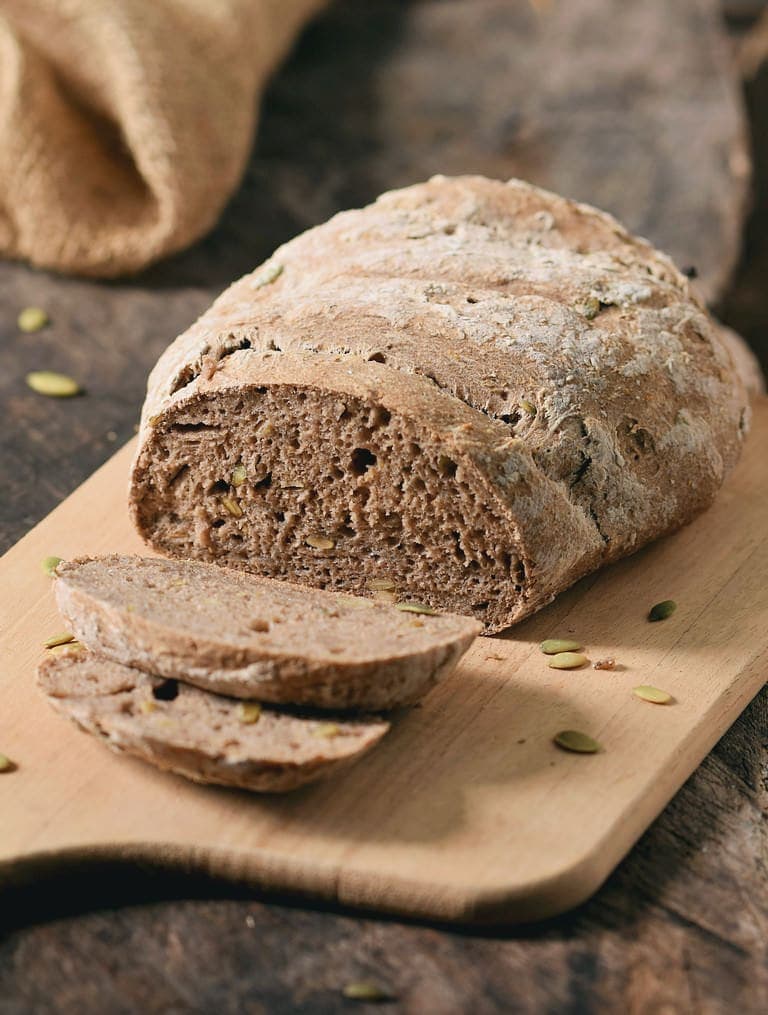
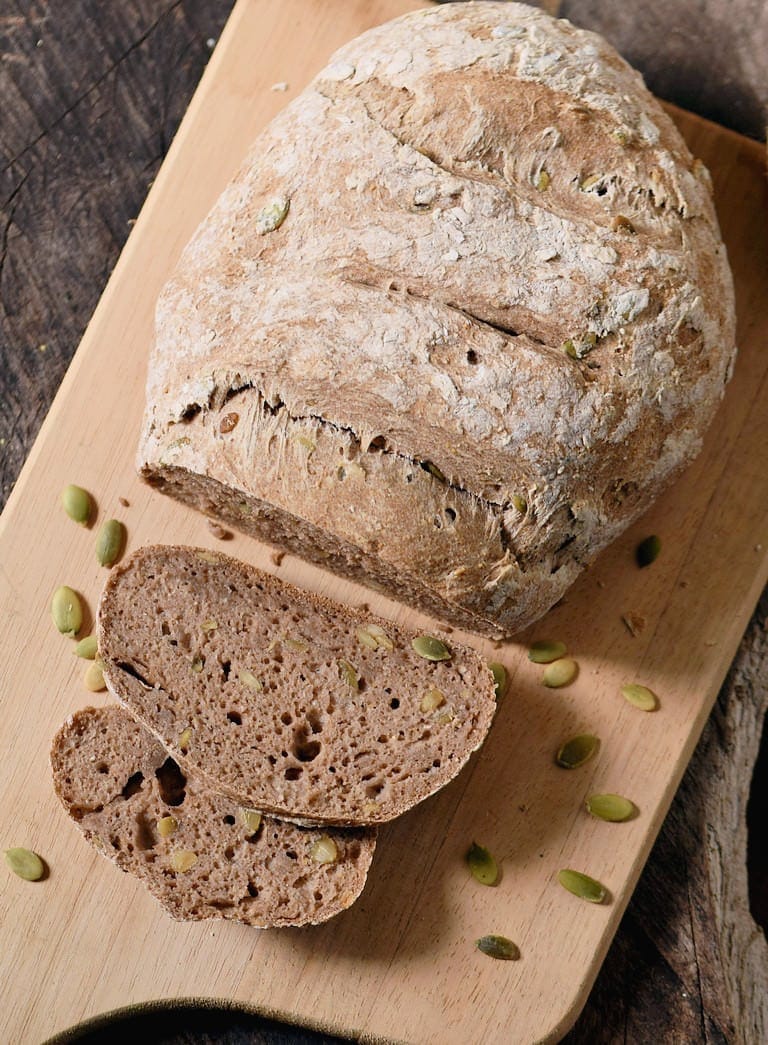
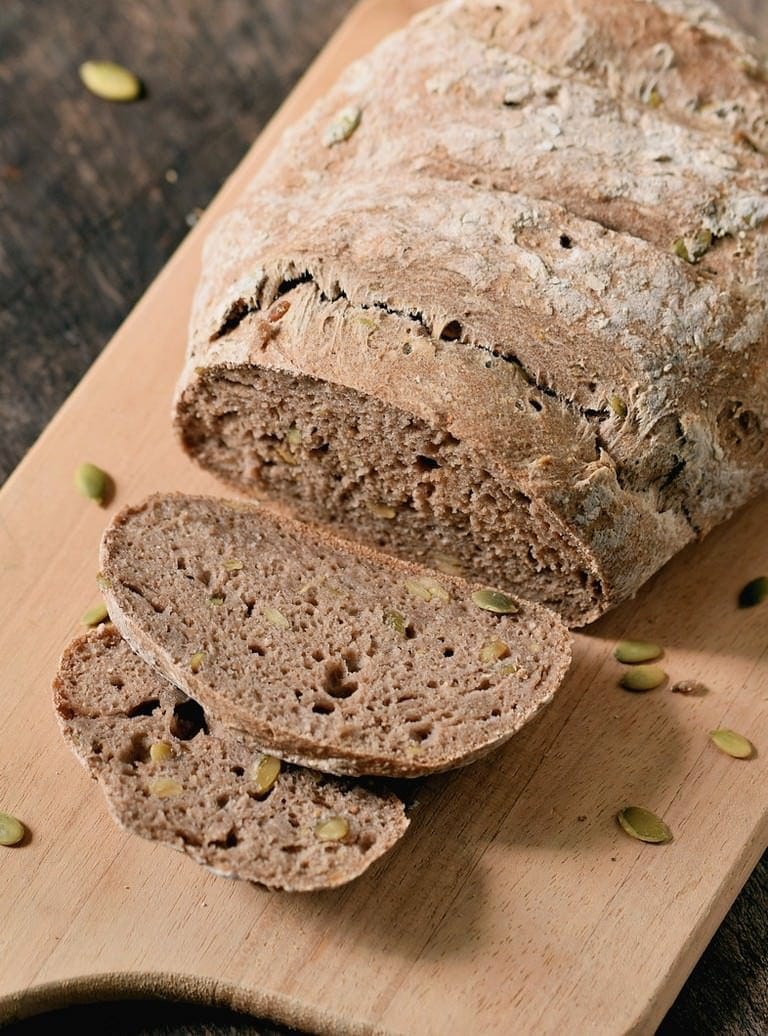
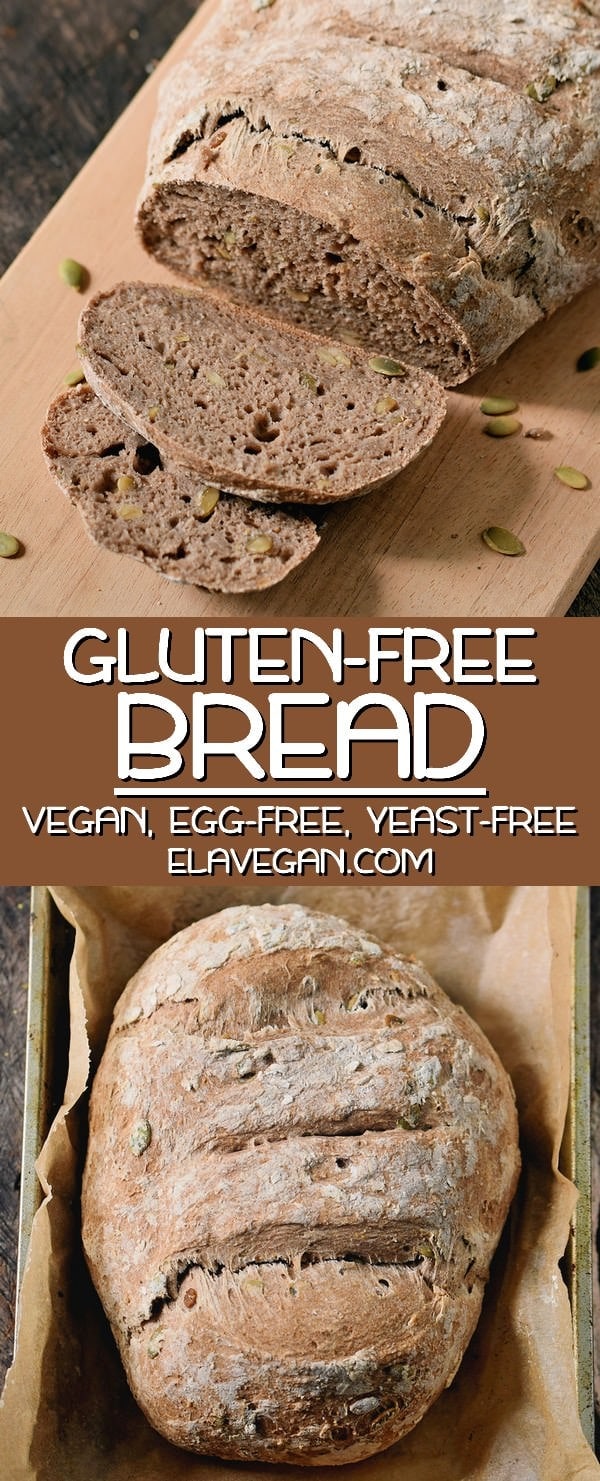
This is the best homemade gluten-free vegan bread recipe which is egg-free, dairy-free, yeast-free, and nutritious! This German bread is actually healthy since it contains psyllium husk powder. It’s crispy on the outside and soft on the inside!
Homemade Gluten-Free Vegan Bread
I cannot tell you how many times I tried making the perfect gluten-free vegan bread… Actually, I lost count how many times I ended up throwing the towel because it’s damn hard to create good gluten-free bread without eggs.
But since I can be quite stubborn (haha) I actually never gave up and continued with the recipe testing…
Psyllium Husk Powder
One day, I started experimenting with gluten-free pizza crust that contains psyllium husk powder. The recipe turned out so good, that I got intrigued.
To make a long story short, I made an online search about homemade gluten-free vegan bread + psyllium husk and found a couple of different recipes that were using huge amounts of psyllium husk powder in their bread recipes.
One recipe was from a German blogger, and she inspired me to give psyllium husk a try. I tweaked her recipe and used a different flour blend and the bread turned out amazing!
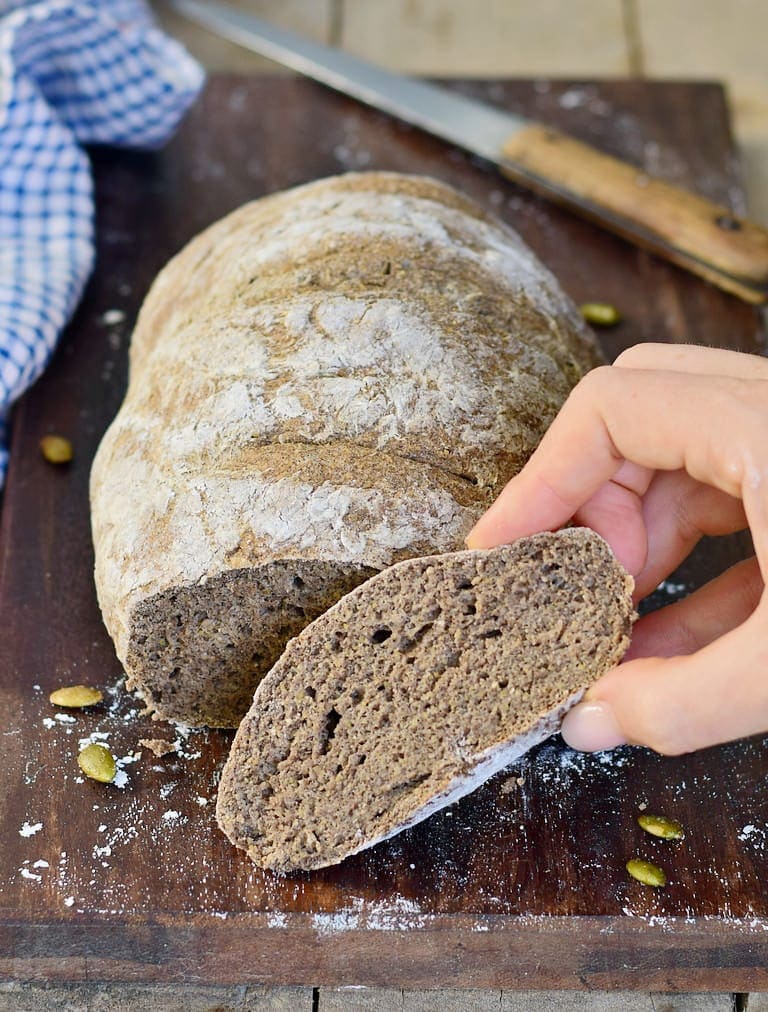
I was shocked by how great it turned out, especially since the bread is wheat-free (and therefore gluten-free), and egg-free (vegan)! It did rise, even though it doesn’t contain yeast and it actually looked like German bread from a bakery.
Conclusion: Psyllium husk powder is a godsend for gluten-free vegan baked goods. It’s also very healthy, especially for our gut! So please do yourself and favor and buy it or order it online. It’s cheap and absolutely amazing!
How To Make Gluten-Free Bread?
Check the video in the post to see how I made this amazing bread.
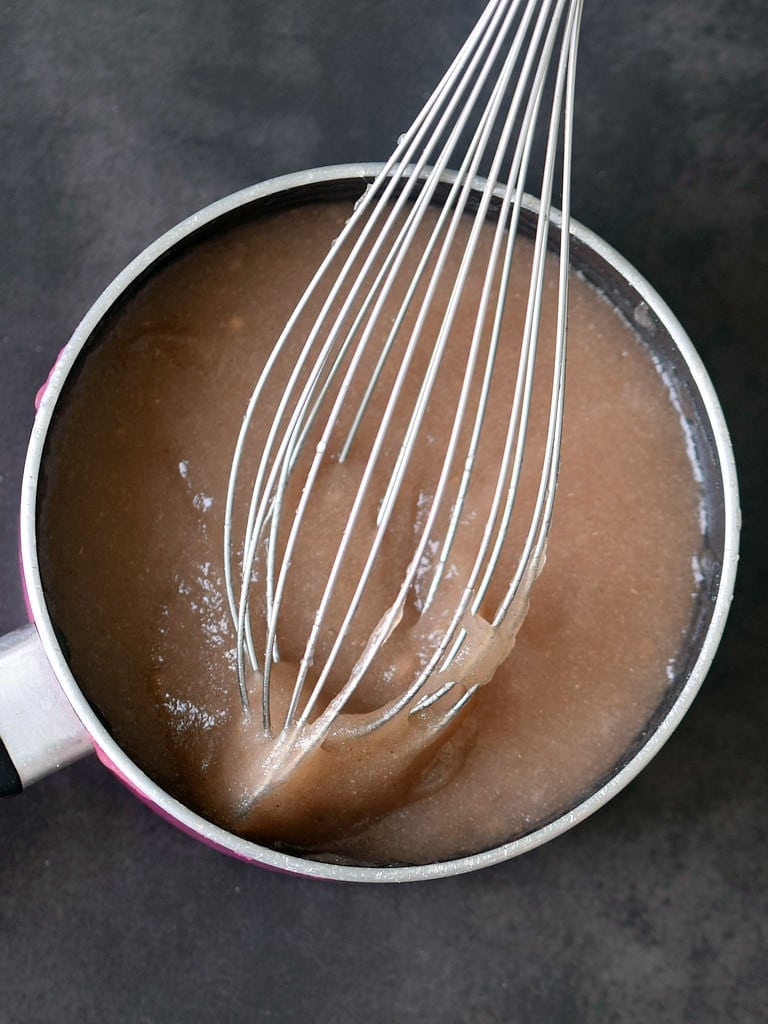
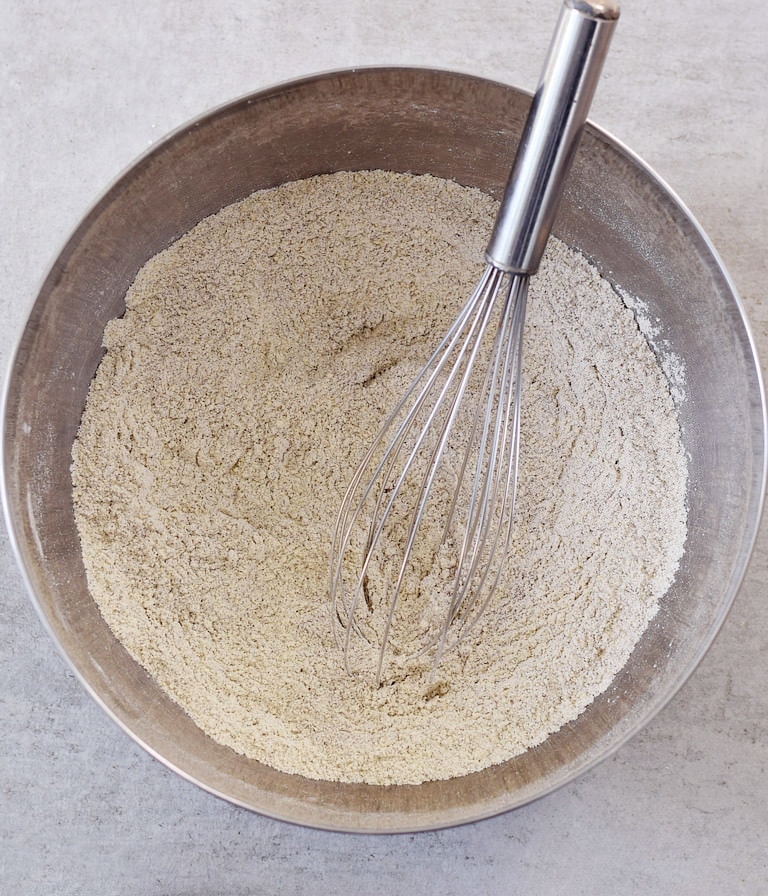
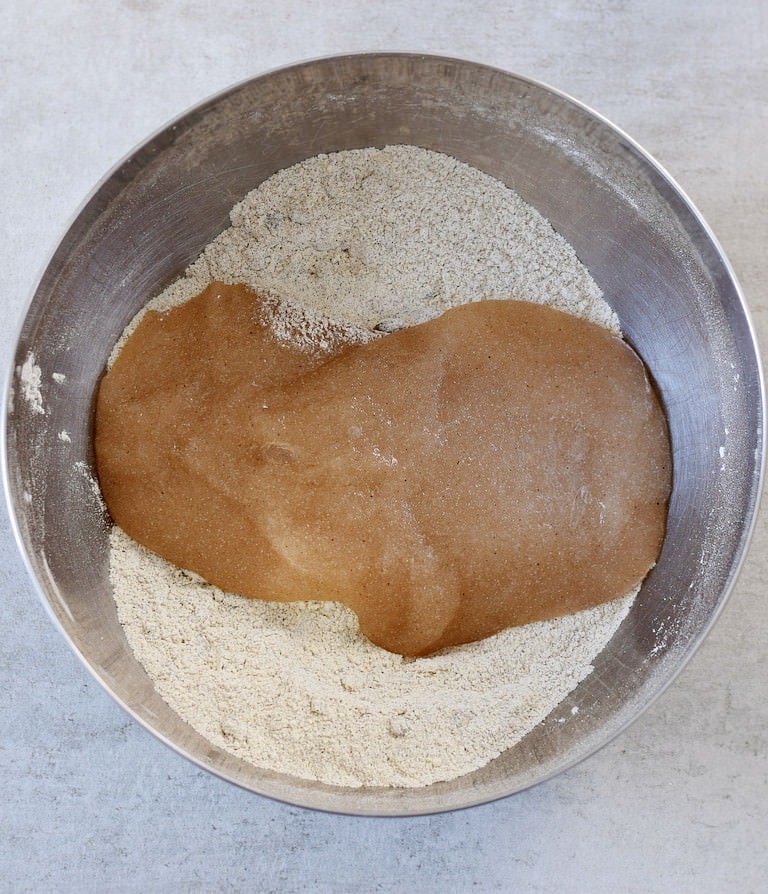
Step 1: Make the psyllium husk gel first. Mix the psyllium husk powder and water in a bowl. Try to be quick, because it gels instantly, within SECONDS. I always use a whisk, it works the best. Set aside and measure the dry bread ingredients in the meantime!
Step 2: It’s time to measure/weigh all dry ingredients and add them to a big bowl. You can also preheat your oven to 390 °F (ca. 200 °C) now.
Step 3: Mix it all together: Add the psyllium gel to the big bowl and mix all ingredients with a hand mixer (use the dough hooks). You can also knead the dough with your hands or use a Kitchen Aid. It will take about 5-10 minutes until the dough comes together.
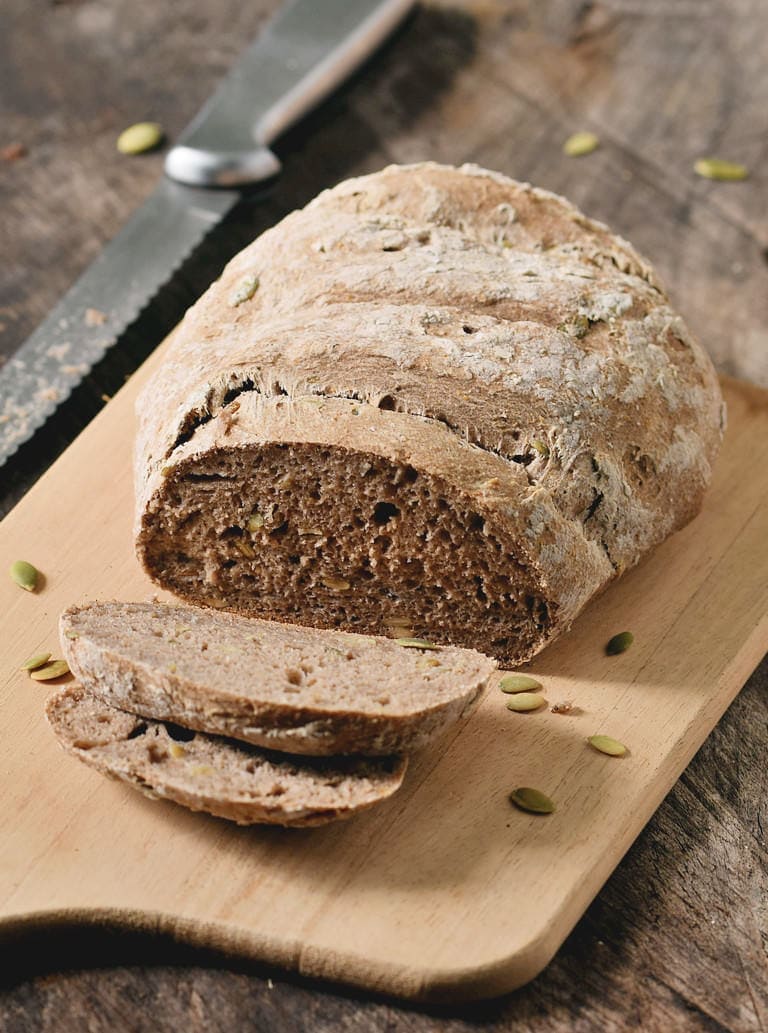
Step 4: Shape the dough and bake the bread in the oven for about 55-60 minutes. That’s it!

Add Seeds Of Choice
I love adding pumpkin seeds but you can also use sunflower seeds, sesame seeds or nuts of choice (e.g. hazelnuts, walnuts, cashews, almonds, etc).
The Ingredients
You can find all the ingredients with measurements below in the recipe card! Please also check the recipe notes below where I list different substitutes.
My favorite flour combo is this:
- Buckwheat flour
- Rice Flour
- Chickpea Flour
- Tapioca Flour
Recipe Notes & Substitutes
- Some readers replaced the buckwheat flour with oat flour or sorghum flour (or a combo) and the bread still turned out amazing.
- Rice flour works great in this bread recipe, but feel free to experiment with lentil flour, teff flour, sorghum flour, or quinoa flour.
- You can use arrowroot flour instead of tapioca flour/starch. Cornstarch or potato starch will most likely work as well.
- Chickpea flour is the same as garbanzo bean flour. It adds plant-based protein and I love adding it to bread. Some readers had success using oat flour instead.
- Psyllium husk powder is the most important ingredient in this recipe and cannot be subbed by any other ingredient. Make sure to use psyllium husk POWDER. If you have psyllium husk (not the powder), you can blend it in a blender or electric spice/coffee grinder until it’s a fine powder.
Can I Freeze Gluten-Free Bread?
You can definitely freeze this gluten-free bread! Slice it and wrap all individual slices in wax paper or parchment paper. Put in zip lock bags and freeze for up to 3 months. Let thaw at room temperature and then toast the bread once you want to serve it.
Other Gluten-Free Bread Recipes
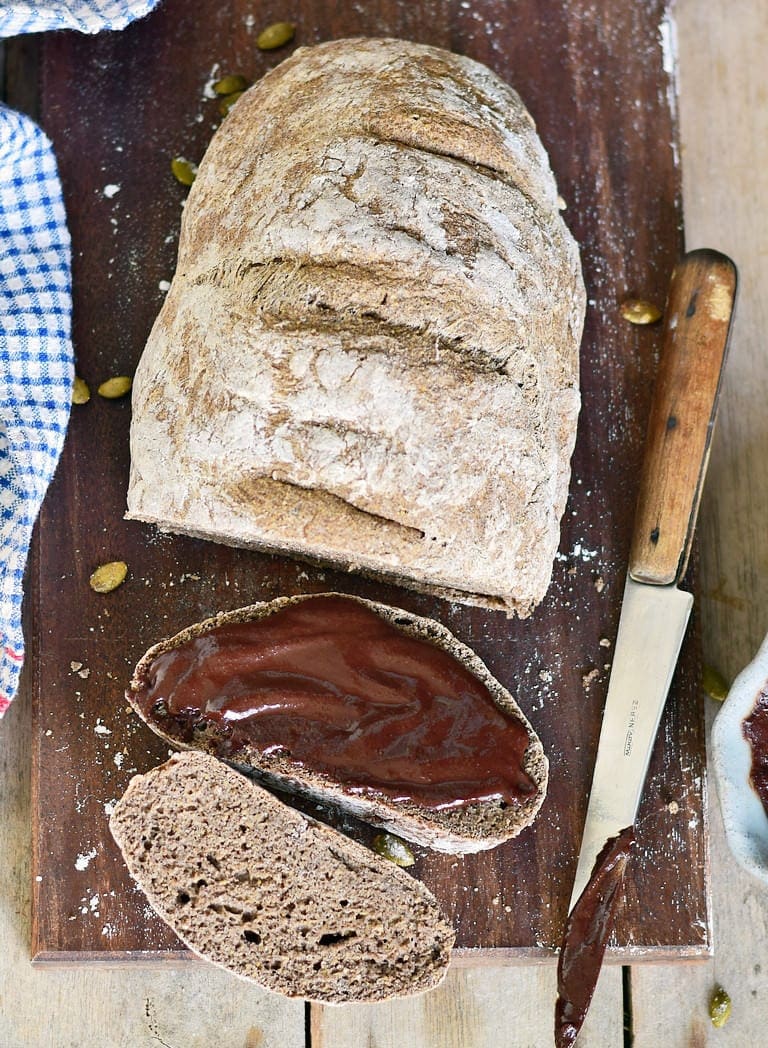
You can serve the bread with stews, soups and all kinds of comfort meals. Make sure to also check out my other vegan and gluten-free bread recipes:
- Gluten-Free Baguette
- Gluten-Free Pita
- Gluten Free Naan
- Gluten Free Buns
- Chocolate Chip Banana Bread
- Pumpkin Bread
- Moist Vegan Cornbread
- Marbled Banana Bread
Should you give this gluten-free German bread recipe a try, please leave a comment and rating below and don’t forget to tag me in your Instagram or Facebook post with @elavegan and #elavegan because I love to see your remakes! 🙂

Gluten-Free Bread Recipe
Video
Ingredients
Dry ingredients:
- 100 g (¾ heaped cup) buckwheat flour (see notes)
- 100 g (⅔ cup) white rice flour
- 100 g (1 cup) chickpea flour
- 40 g (5 Tbsp) tapioca flour/starch (see notes)
- 1 tsp baking powder
- ½ tsp baking soda
- ¾-1 tsp sea salt
- 50 g (⅜ cup) pumpkin seeds (optional - see notes)
Psyllium mixture:
- 450 ml (1.8 cups) water
- 30 g (3 Tbsp) psyllium husk powder (see notes)
Instructions
- I recommend using the metric measurements for this recipe (grams/ml). In a bowl, combine the water with the psyllium husk powder and whisk well. It will gel instantly and become thick. Set aside for 20-30 minutes.
- Meanwhile, measure/weigh all the dry ingredients and add them to a large bowl. Preheat the oven to 390 °F (200 °C).
- Add the psyllium gel to the bowl and knead the ingredients with a hand/ stand mixer (use a dough hook). You can also knead the dough with your hands. It will take about 5-10 minutes for the dough to come together.
- If the dough appears too wet, sprinkle it with 1-2 Tbsp tapioca flour. If it feels too dry, add a little water.
- Shape the dough into a round or rectangular loaf and place it on a baking sheet lined with parchment paper (I sprinkled the paper with a bit of tapioca flour).
- Bake for 50-60 minutes. Let the bread cool completely, then slice and enjoy. The bread freezes well, for up to 3 months!
Notes
Video Of The Recipe
- Psyllium husk powder is the most important ingredient in this recipe and cannot be substituted by any other ingredient. Make sure to use psyllium husk POWDER. If you have whole psyllium husk (not the powder), you can blend it in a blender or electric spice/coffee grinder until it's a fine powder.
- A few people mentioned a weird smell in the bread (I didn't, and most other people didn't either), however, I received a few helpful comments.
- You can use whole-grain buckwheat flour or regular, both are fine. Some people replaced the buckwheat flour with oat flour or sorghum flour (or a combo) and the bread still turned out amazing.
- Rice flour works great in this bread recipe, but feel free to experiment with lentil flour, teff flour, sorghum flour, or quinoa flour.
- You can use arrowroot flour instead of tapioca flour/starch. Cornstarch or potato starch will most likely work as well.
- Chickpea flour is the same as garbanzo bean flour. It adds plant-based protein and I love adding it to bread. Some readers had success using oat flour instead.
- Please don't compare this bread with wheat bread which contains gluten and yeast or a gluten-free bread which was made with eggs and yeast. It's hard to make a gluten-free, yeast-free, vegan bread, but this is the best recipe I have tried so far, and it turns out amazing every time! Depending on the flour mixture, the bread might end up more fluffy or dense.
- Pumpkin seeds: You can use sunflower seeds instead, however, they will turn green due to a chemical reaction with the baking soda/powder. This is perfectly fine and shouldn't concern you.
Nutrition information is an estimate and has been calculated automatically
Equipment
 „Simple and Delicious Vegan“ Cookbook by ElaVeganCLICK HERE to order!
If you are using Pinterest, feel free to pin the following photo:
I feel like I hit the jackpot when I found your recipe for Gluten free vegan bread on Pinterest! I have been making different gf breads for a while and yours is by far the most delicious!!!So easy to make and I really appreciate that it doesn’t have any sweetener of any kind as I was born with Hereditary Fructose Intolerance and can detect even the smallest amount of sweetener/sugar in a recipe.
I look forward to trying your other recipes (spinach wraps are next on my list) as I know they will be delicious too!
Thank you so much.
Thank you so much for your wonderful comment, Maria! I am so glad you loved the bread. 🙂
I was thrilled to find this whilst despairing of being able to bake bread for a young friend coming for lunch, who is allergic to gluten, eggs and dairy. I regularly bake sourdough but my starter is not gluten free, and every option looked pretty terrible.
Today I made this, exactly to your specifications apart from swapping out the chickpea flour for an almond/flaxseed flour. It rose beyond expectation, looked and smelled great, but when I cut into it found the centre was undercooked and doughy 🙁
My friend was impressed and very touched, ate all the cooked ends portions and took the rest home to toast! Turns out she had also just come across your recipe and was keen to give it a go, as she’s found most bread recipes unsatisfactory.
Because my oven cooks on the hot side I baked it at 170C for 60min – do you think the extra 7deg would have made the difference?
Thanks anyway, I’m an impressed Aussie 🙂
Hello, dear Kerry! Thanks for your kind comment. I am pretty sure it was the almond/flaxseed flour. Almond flour (and also flax meal) contain 50% of fat and should be added only in smaller quantities. Maybe, if you give it another try you can replace just 30% of the chickpea flour with flax meal or almond flour and the other 70% with a different flour like quinoa, teff, sorghum, etc. That should work fine. 🙂
Hello Ela, I understand the buckwheat flour is a must in this recipe but what about Dinkel ? Thanks a lot!!
Hi Claudia, someone commented that spelt flour (Dinkel) didn’t work very well in this recipe. Maybe because of the gluten. Most gluten-free flours like quinoa flour, teff flour, rice flour, etc. worked amazingly though!
my goal was to find a bread recipe that was yeast, gluten, dairy, egg, xanthan, legume, rice free for my 89 yr old mother.. your recipe except for the rice & chickpea fit the bill.
my 1st loaf was promising, but it did not rise probably because i did not mix the psyllium/dry ingredients long enough.
2nd loaf i used a timer. i also switched out the flours, using gf girl’s grain free ratios which weighed out was
102 g buckwheat,
68 g almond flour,
68 g potato flour,
68 g arrowroot flour,
34 g flax meal.
it rose beautifully, inner temp was 201F at 50 min, so i pulled the loaf. it eventually collapsed. was quite moist inside, but seemed cooked. so next time i will bake it longer. the flavor was quite good. my spouse thought it was similar to a mild wheat bread. i think he objected to the chickpea flour flavor in the original loaf. i will try this again.with the full 55-60 min cook time.
thank you for this thoughtful recipe. i know you spent a lot of time & ingredients on this.
the comments were extremely helpful in guiding me.. read thru them 3 times & wrote a spreadsheet before i started baking.
although this is a quick bread technically, it does not have the texture of one. the chew is not gluten, but it is enjoyable. my spouse found the texture different but acceptable next to the gluten free yeast bread i made.
Thanks for your comment, Cynthia. Yes, definitely cook it for 55-60 minutes next time, it will make a huge difference. Also, I am not sure if almond flour is the best choice, other flours have been more successful it seems. Happy you liked it though. 🙂
3rd & 4th loaves, increased times to 60 & 70 min. improved bake but eventually collapsed.
5th loaf, raised the temp to 400F for 60 min. worked perfectly.
i’d forgotten that for every 10 min, i could change the temp by 25F. since i wanted to keep to 60 min, but drive more moisture out to achieve a finished bake. my food sicence background did not cover baking.
GF Girl has pretty good theoretical & practical knowledge of how of how to blend various flour mixes (40%whole grains:60% starches).. i had confidence in her GF Grain Free blend.
your recipe is brilliant.
my husband finds it good for dipping in olive oil & sandwiches.
Thanks so much for reporting back, Cynthia! Very much appreciated. 🙂
Hi Ela, This looks absolutely wonderful! I just got all the ingredients but I can’t find the video? I click on the ‘Jump to video’. but it just brings me to the recipe. I have tried searching on Youtube but can’t find it there either. Could you please send the link?
Also I don’t have a scale, do you think I could still try using the cup measurements?
Many thanks for your recipes and work you put into this blog!
Chris
Hi Chris, the recipe video is now embedded in the recipe card. There is a green button on top of each post that says “Jump to Video”. If you click it, you will skip right to the video. I hope this helps!
Yes, the cup measurements should work fine. I hope you will enjoy the recipe. 🙂
I’m so happy I came across this bread of yours, I had some tweaks such as adding dry tomatoes and nutritional yeast , I have also replaced the buckwheat flour with rice flour taking the risk 🙂 (as I didn’t have buckwheat at home) – but regardless after an hour it came out just amazing. !!!
I put some vegan cheese on it and it was fantastic..
Thank you so much for this wonderful recipe.
That’s awesome, Ed! I am glad it came out great without buckwheat flour. Thanks for sharing. 🙂
I have made this bread tons of times, I add cranberries and flax seeds usually. It is the perfect bread, thank you so much! (I also adore your other recipes and I have spread the word about your blog many times :)).
The only “problem” with this bread is.. it’s too yummy so we finish it too quickly! 😀 I wonder what the measurements would be if I would want to make a bigger bread, like 800grams? Do I just multiply every ingredient by 1,5 or doesn’t it work like that?
Could you help me? I’m Belgian so I use the metric system.
Thank you so much.. For everything!
Hi Elke! I am so glad you love it. Yes, you can definitely multiply each ingredient by 1.5 to make a larger loaf. 🙂
Enjoy it!
Thank you Ela. My first bread was the best bread – all thanks to you. I baked it in my microwave convection – it rose twice as big. I used the weighing scale and that helped. It was soft, cooked perfectly at 60 mins and nothing went wrong. I’ve tagged you on my Instagram. I also tried your chocolate muffins the same day as I felt so motivated. This is the first time nothing went wrong and everyone in my family loved the two. Thanks a ton!
Wow, that’s so amazing, Vini!!! I am so glad you loved the bread (and the muffins). Thanks so much for your great feedback. 🙂
Hi there.
I’ve just found out that I’m intolerant to cow’s milk, casein & Bakers Yeast. I searched for an easy-to-make homemade bread and came across yours. I made it this afternoon and it turned out great. Next time I’ll make 2 loaves, one to freeze & one for the fridge.
I’m a Naturopath in Australia. Can I share your recipe, giving credit obviously, with my patients?
Thanks heaps, Mandy ????
Hi Mandy, yes, that’s fine. I am so glad you love the recipe. 🙂
Hello Ela! Thank you for this recipe, my bread look and taste great.
Great! I am so happy it turned out amazing, Mirka. 🙂
Can you recommend a substitute for the chickpea flour at all please? I find the smell and taste too strong, otherwise it’s fabulous texture wise
You could try lentil flour or quinoa flour. Also, please check the comment section, there are so many amazing tips from different readers. 🙂
I made this bread 3 times so far and it always turned amazing! Its the best gluten free bread I have made or eaten so far, its become a standard in my household. I shared the reciepe with so man people as well.
My substitutions: I always used brown rice flour instead of white rice and once I used quiona flour instead of chickpea flour. Both were great 🙂 thank you Ela
That’s wonderful, Dana! I am so glad it always turns out amazing! Thanks for sharing your substitutes, that’s very helpful. 🙂
Much love, Ela
I love this bread. I make two loaves about every two weeks. I have changed a few things:
I mix my dough (one recipe at a time) in my food processor, using the cutting blade. The dough blade is too short and won’t scrape the sides. Pulse until well mixed and then transfer to a bowl to finish and shape for your pan. I also put some extra tapioca starch in a small bowl to dust my hands while shaping the bread.
I omitted the seeds and added 3 TBSP Caraway Seeds and 2 Tbsp Black Strap Molasses. Makes it taste like a pumpernickel bread. Hope you enjoy.
Love this bread.
That’s awesome, Cheryl! Never thought about adding Black Strap Molasses. Thanks for your helpful comment! 🙂
Much love, Ela
HI, Ela
could you please sent the video link for this bread recipe?
Hi, the recipe video is now embedded in the recipe card. There is a green button on top of each post that says “Jump to Video”. If you click it, you will skip right to the video. I hope this helps!
Ела! Не перестаю Вами восхищаться!!!Сегодня испекла хлеб! Восторг! Спасибо большое за Ваш кулинарный талант и любовь к людям!!!
You are so kind, thank you very much. 🙂
This is officially now my favorite go-to bread recipe. You’re a genius, Ela! I just made two loaves today. My son just dug into one of them and loves it. I added a bunch of dehydrated onions to one of them for extra flavor.
I am so glad you loved it! Thanks so much for your kind comment. 🙂
This heavenly bread was the very first time I ever made my own bread before. So glad I used this recipe. Ela your recipes are truly my most cherished. Thank you.
Aww, you are very kind! I am so glad you like my recipes.
Much love, Ela
I can’t wait to try this recipe this week! Does anyone know if it would work in a bread machine?
Thank you again Ela for this awesome recipe!
Yes, Nikki. Check the comments, one (or more) readers already tried that with success.
Hi Ela! Thanks for all your hard work developing these recipes and your generosity for sharing them!
Does this bread taste “beany” at all from the chickpea flour?
Hi Tasha, no, it doesn’t. At least not to me and if you check previous comments, you probably won’t see that anyone mentions it. 🙂
I am impressed with this recipe/approach. I have baked vegan gluten-free for years, and it has instantly become my weekly go-to. Thanks!
I will offer my favorite variation so far, which is a yeasted version. Even without the yeast, it comes out very nice with my tweaks.
Combine 1 cup of soymilk warmed to 100-120 F, 2 tbsp sugar and a ¼ oz dry yeast packet, and let it sit 15 min to activate – it should become foamy. Add 1 cup of warm water, and I like a small splash (maybe 1 tsp) of apple cider vinegar also (the acidity works well with the baking soda to create more rise). Whisk it together, then add the 3 tbsp psyllium husk powder and whisk it together to create the gel/sponge. Set aside for 15 min.
As for the dry mix, I like buckwheat flour, but since it can have too strong a taste I prefer to use ¼ cup. I like garbanzo bean flour for the nice rise it provides, but since it can leave a beany smell/taste I prefer to use ¼ cup also. For the last 2 cups, I have settled on using Cara’s Special Blend – thanks @forksandbeans! You might use something else, but this what I have on hand. I make it in big batches, but for this recipe you want 2/3 cup millet flour, 2/3 cup oat flour (grind some gluten-free oats), 1/3 cup arrowroot flour and 1/3 cup tapioca flour. If you want to substitute, @forksandbeans has published this awesome guide. It makes it clear what can be substituted for what, by teaching the concepts of light/medium/heavy flours. Add 1 tsp baking powder, ½ tsp baking soda and ½ tsp salt.
I knead it by hand – take my time, see how it responds. There is an old saying with dough that “wetter is better.” I try to make sure that the dough is still somewhat sticky after I have mopped up all the flour on the counter. I often end up adding 1-2 tbsp water, as needed, to avoid the dough getting too dry. I shape the loaf and put it on a baking sheet with parchment paper and a sprinkle of flour. In anticipation of significant rise, to avoid cracks I cut about eight deep slits across the top. I also cut two deep horizontal slits at the base, one on each side. Make them deeper than you think they should be – trust me on this one.
Every oven is individual, but I have settled on 65 min at 350 F.
Take it out, let it cool, and enjoy!
Thanks for sharing. 🙂
So easy, I love it !! I am so happy. I had to put 4 tbsp of psyllium so it gets the gelly texture as yours, your video help with that !
Thanks from Canada 🙂
I am glad it turned out great, Isabelle! 🙂
This was excellent. Thanks so much. Loved it. One question doesn’t seem to have come up is about storage. Do you keep this in the fridge or outside, wrapped in a tea towel? I have no idea how to keep it fresh. What do you recommend? Thanks.
Hi Maria, since I live in the tropics I have to store basically everything in the refrigerator. If it’s cold where you live, you can probably also store it outside, wrapped in a tea towel. It does dry out a little, no matter how you store it, but you can reheat it in the oven for a few minutes or toast the bread slices! 🙂